Derwent Reservoir Walk
Visit the impressive Derwent Dam and enjoy views from the surrounding hills on this walk from Fairholmes
About the walk
This circular walk in the Upper Derwent Valley takes you alongside the stunning Derwent Reservoir with its impressive dam and beautiful surrounding hills. Enjoy a mix of woodland paths, open moorland and scenic views over the water. This walk will take you away from the crowds on the lower trails, into the peaceful surroundings of the moorland above Derwent dam.
Additionally, the reservoir and its surroundings are rich in wildlife, making this a great area for birdwatching and enjoying nature.
The Upper Derwent Valley has an interesting history. The area was once home to several villages, including Derwent and Ashopton, which were flooded in the 1940s to create the reservoirs. The remains of the villages can sometimes be seen when water levels are low.
Need-to-know
-
Pay & Display parking at Fairholmes (Upper Derwent) Car Park.
Parking prices, per car (last checked July 2025):
- Up to 2 hours, £3.50
- 2 to 4 hours, £6.00
- Over 4 hours, £7.00
Payment by coins (no change given), or by card; charges apply every day at all times. (Note that the payment machine on the upper level does not accept card payments.) You can also pay at the Bike Hire reception behind the toilets. Payment is also possible using RingGo location 51736.
If the main car park is full, there is additional parking (also Pay & Display) 300 metres back along the main access road, at Derwent Overlook Car Park (RingGo location 51707).
Sadly, there’s NO PUBLIC TRANSPORT to this location (the 257 Sunday bus service ceased operations mid-July 2025).
- 3½ miles / 5½ kilometres circular walk.
- 2 hours at a leisurely pace.
- 700 ft (215 m) ascent and descent.
- Mixed terrain near Derwent Reservoir and in the hills above (including some steep rocky slopes, a long set of steps beside the dam, and possible boggy ground after wet weather); not suitable for wheelchair users or for pushchairs.
- No stiles.
- The Fairholmes (Upper Derwent) Visitor Centre, where this walk starts and finishes, has a refreshment kiosk (including ice cream), and toilets. Toilets are open until around 5pm in winter and 7pm in summer. The refreshment kiosk is open from 8am until 6–7pm depending on how busy it is.
Getting there
By car: Start and finish at Fairholmes (Upper Derwent) Car Park (arrowed on the following map).
See Need-to-know for detailed parking information.
The following may help if you use a satnav:
- nearest postcode: S33 0AQ (this postcode covers a wide area around Ladybower Reservoir. For a more precise location, you should enter the name – *Fairholmes Car Park*, what3words, latitude/longitude, or Ordnance Survey grid reference figures into your satnav).
- what3words: opposites.awoke.otherwise
- Latitude, Longitude: 53.401, -1.742
- Ordnance Survey grid reference: SK 172 893
Map & directions
This simplified map provides guidance for the route described – the numbers refer to the numbered steps in the walk description. This map is not suitable for detailed navigation, for which you should use a copy of the relevant Ordnance Survey map.
The Ordnance Survey map covers a bigger area along with important information such as place names, official rights of way, and areas of Access Land.
For this walk, the ideal map is the Explorer Series Number OL1: The Peak District - Dark Peak Area (Kinder Scout, Bleaklow, Black Hill & Ladybower Reservoir), which includes the whole area of the walk at 1:25 000 scale (4 centimetres to 1 kilometre).

Contour interval: 10 metres; index contours, 50 metres. North at top (approximate).
Map data from OpenStreetMap (available under the Open Database Licence). Contains Ordnance Survey data © Crown copyright & database right 2010–2023.
Stage 1: Fairholmes to above Walker's Clough
-
From the refreshment kiosk and Visitor Centre, cross the road and follow the sign to “Derwent Dam Walking Trails”, past some picnic tables and along a smooth tarmac path with views down and right to the reservoir.
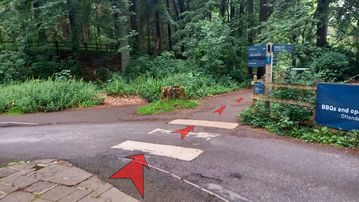
-
After 100 metres turn right onto the road (signed to “Derwent, Howden and Slippery Stones Trail”).
Follow the road for about 150 metres – ignoring a sign on the left to “Derwent Dam West Tower” – crossing a bridge with stone parapets.
Just after the bridge, a short circular nature trail with wooden sculptures and interpretive signs begins on the right. We’re not going this way, but it’ll only take ten minutes to explore if you wish (about 350 metres of trail).
-
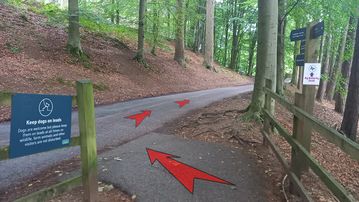
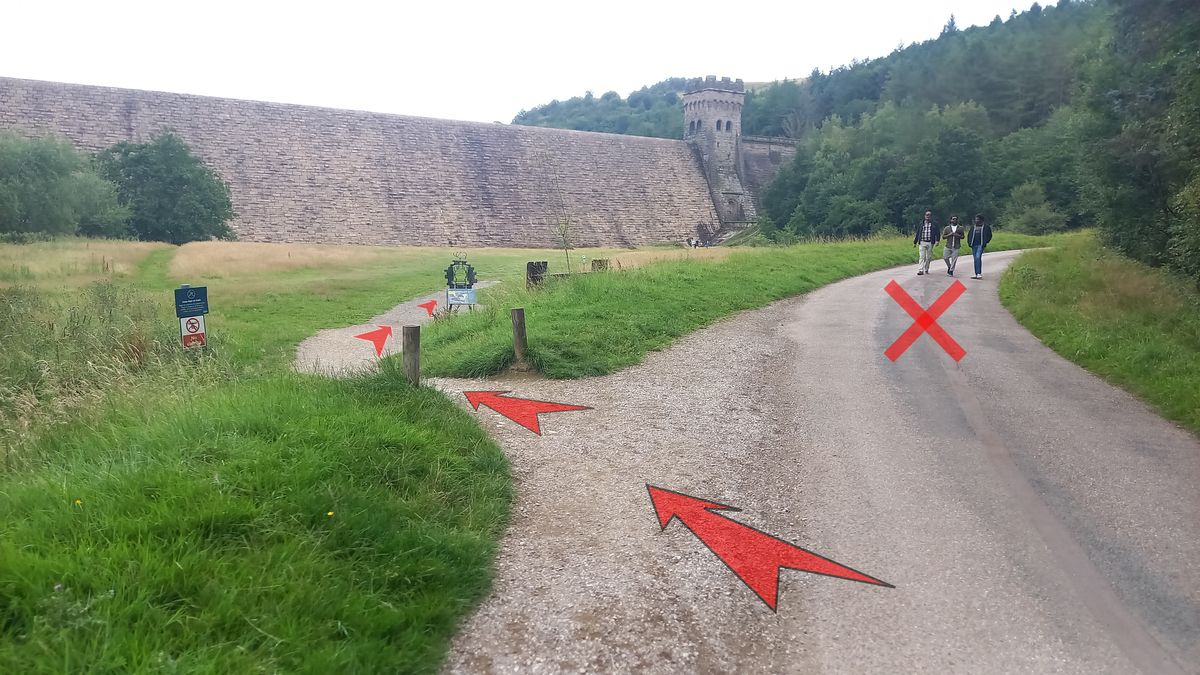
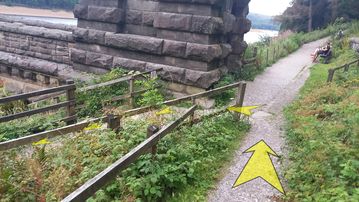
Not far beyond the nature trail path, a gravel path drops off to the left of the road and heads diagonally across a meadow to the bottom of the imposing Derwent Dam wall.
Follow the obvious path towards the East Tower of the dam.

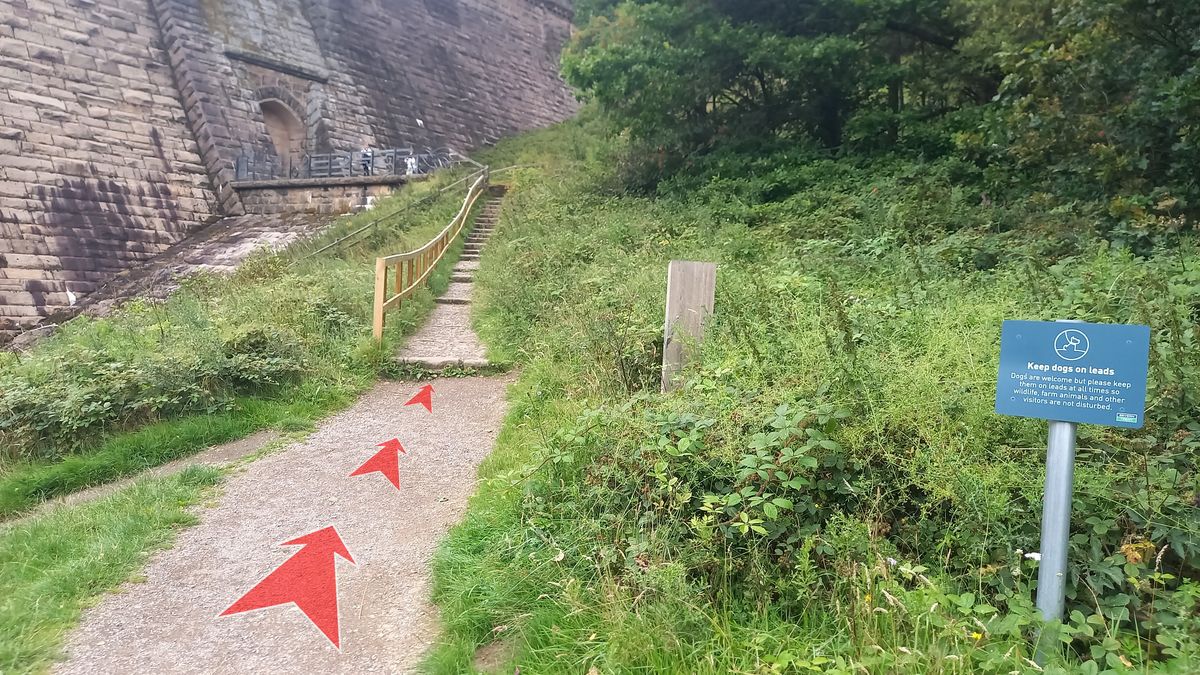
-
Upon reaching the corner of the meadow, follow the gravel path up several flights of steps until you reach the top of the dam wall at the East Tower. This is quite a steep climb, so take your time and enjoy the views as you ascend.
There is a viewing platform for the dam wall off to the left at the top of the first flight of steps.

-
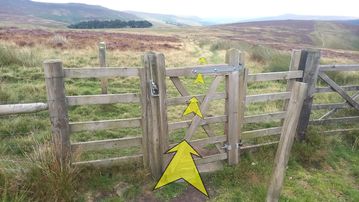
At the top of the last flight of steps, turn left and follow the path towards a wooden gate.
There’s a handy bench on the right, not far from the top of the steps, with nice views out over Derwent Reservoir.
-
After about 50 metres, go through the wooden gate and continue left along a wide flat track.
You’ll now follow this track for about 1 kilometre (⅔ of a mile), with the reservoir to your left and forestry plantations rising to your right.

-
About 200 metres from the gate, you’ll cross Hollin Clough on a bridge with stone parapets. Ignore any paths off the main track, and continue on through pleasant woodland.

-
As you continue along the broad track, views across the reservoir open up to the left.
-
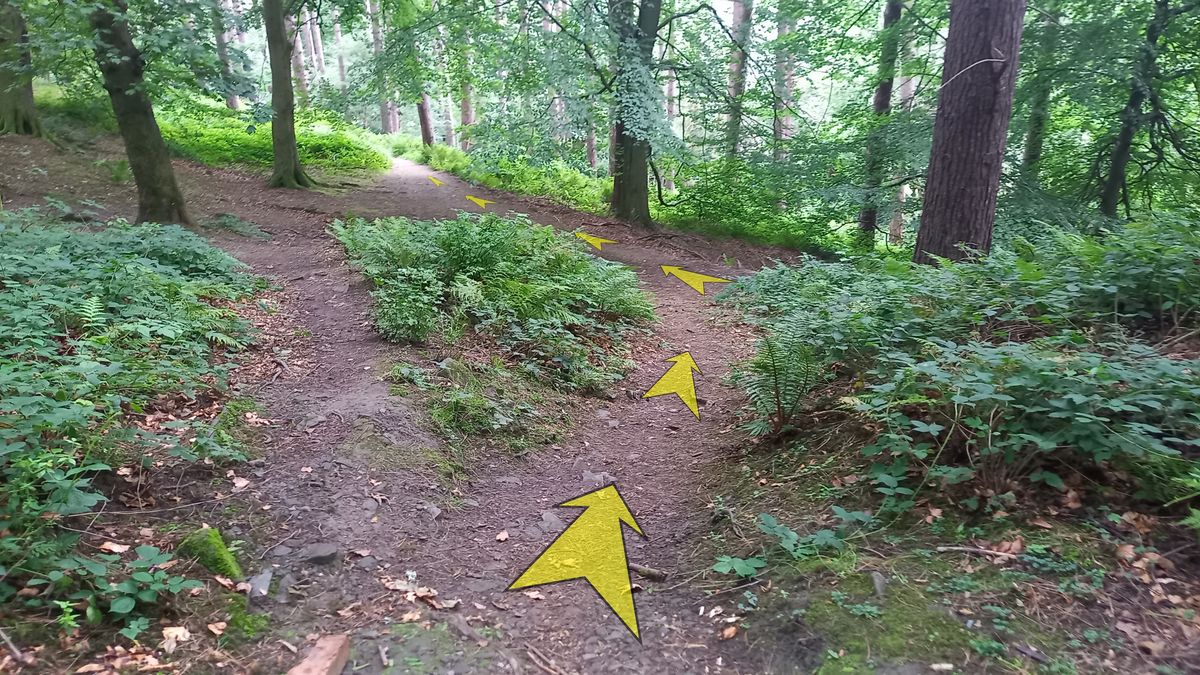
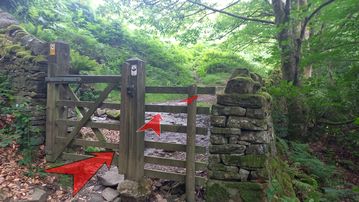
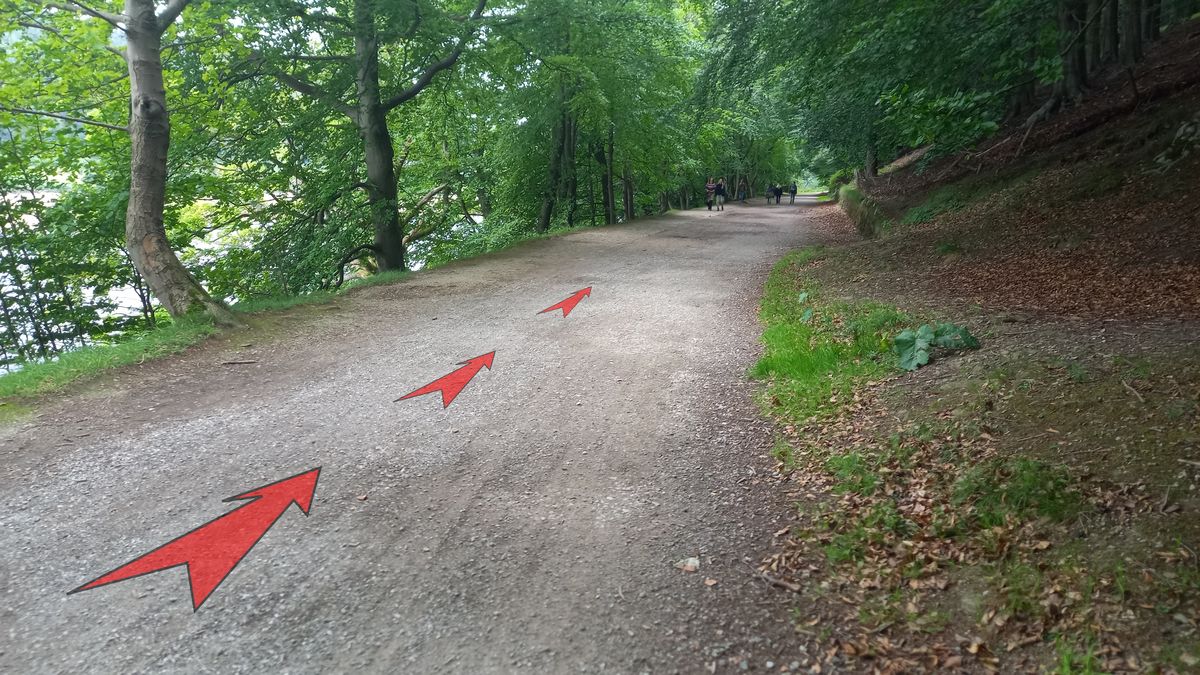
About 1 kilometre from the wooden gate where you joined the broad track, at a left-hand bend, look out for an earthy path climbing into the woods on the right.
A green Peak and Northern Footpaths Society sign (no. 191) indicates the path to “Bradfield & Strines”.
Leave the main track here and follow the earthy path into the woods.

-
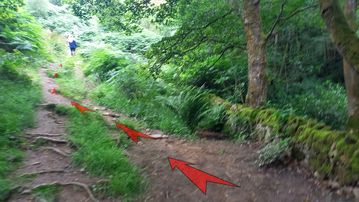
Just past the signpost, ensure that you follow the earthy path to the right. Ignore the branch of the path that heads left.
-
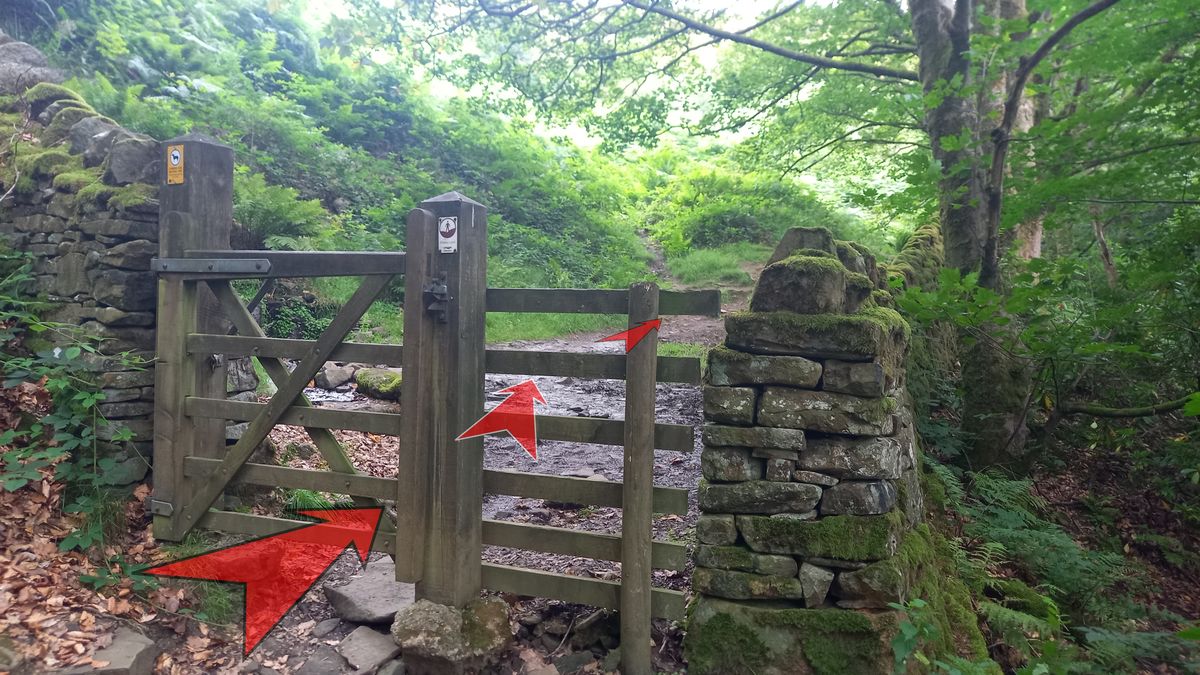
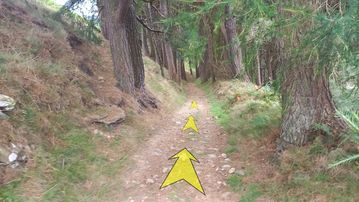
The path gradually climbs through the woods alongside a stream (Walker’s Clough) down to your right.
After about 100 metres, go through the wooden gate.
-
From this point, the path becomes steeper and more stony as it climbs up the hillside and starts to leave the woodland behind.
Not far from the wooden gate, you’ll pass a National Trust sign for “Walker’s Clough”, with a notice giving more information about the High Peak landscape.
-
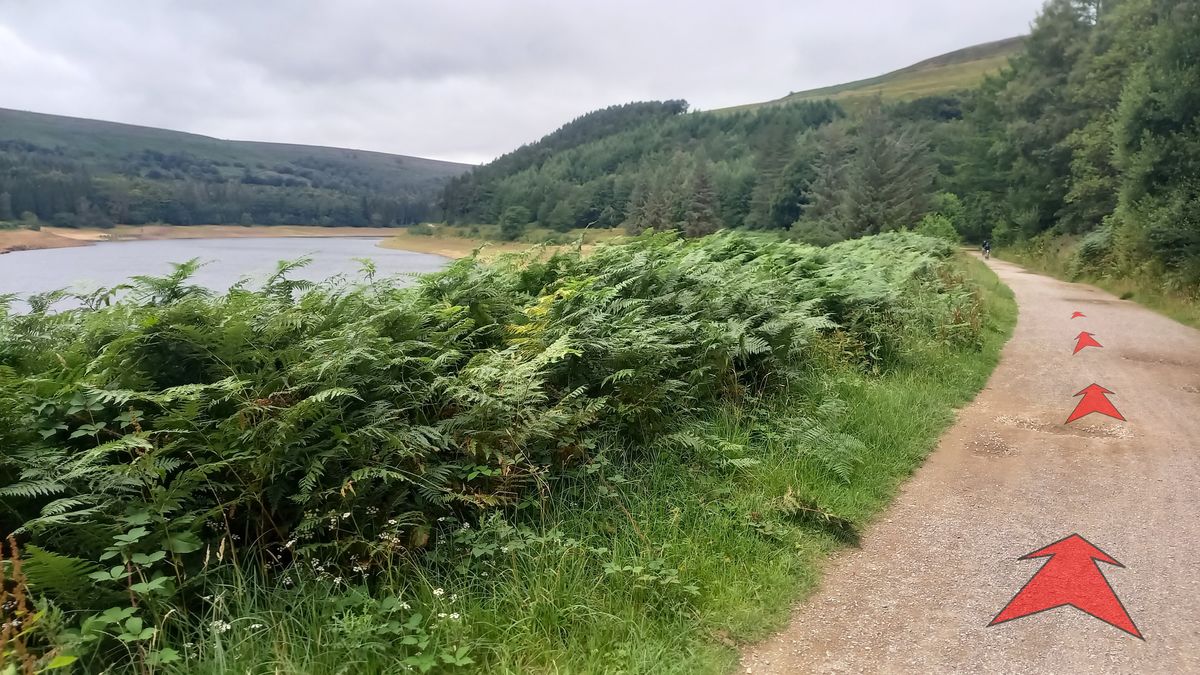
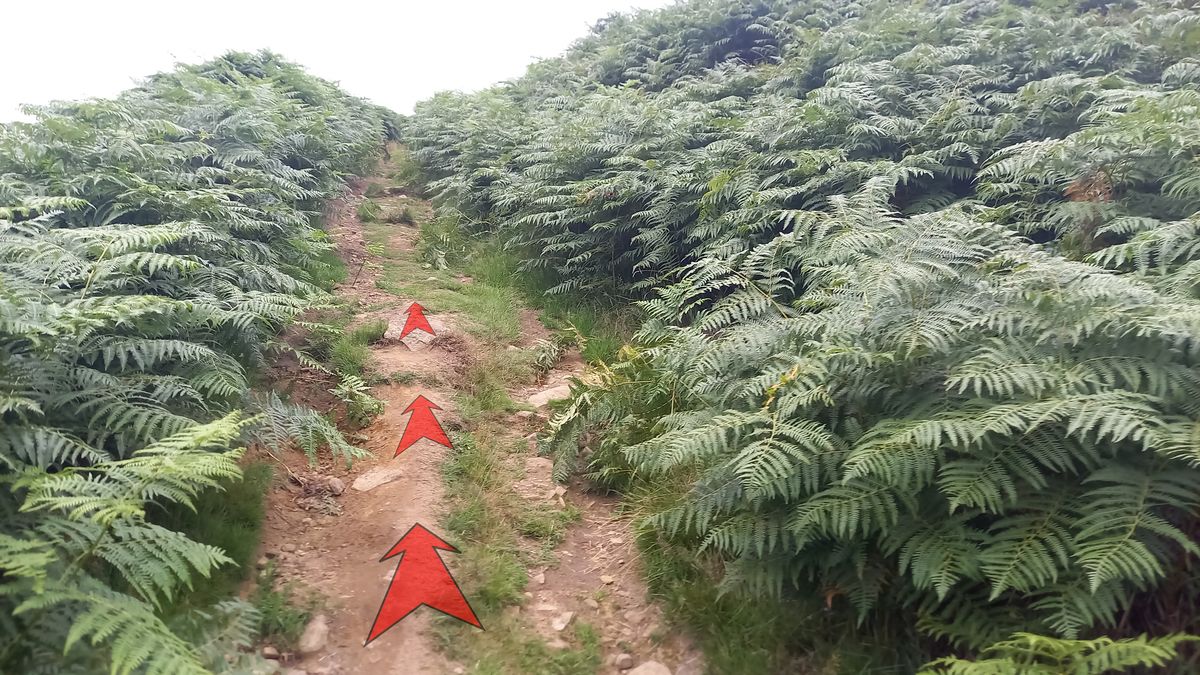
Continue on up the steep path. As you climb, the views back into the Upper Derwent Valley and the reservoir will improve.
In late summer, bracken may start to encroach on the path, but it should remain easy to follow.
Take your time on this section, as it can be quite steep and uneven underfoot.

-
About 200 metres from the wooden gate, the path swings to the right, and continues to climb.
-
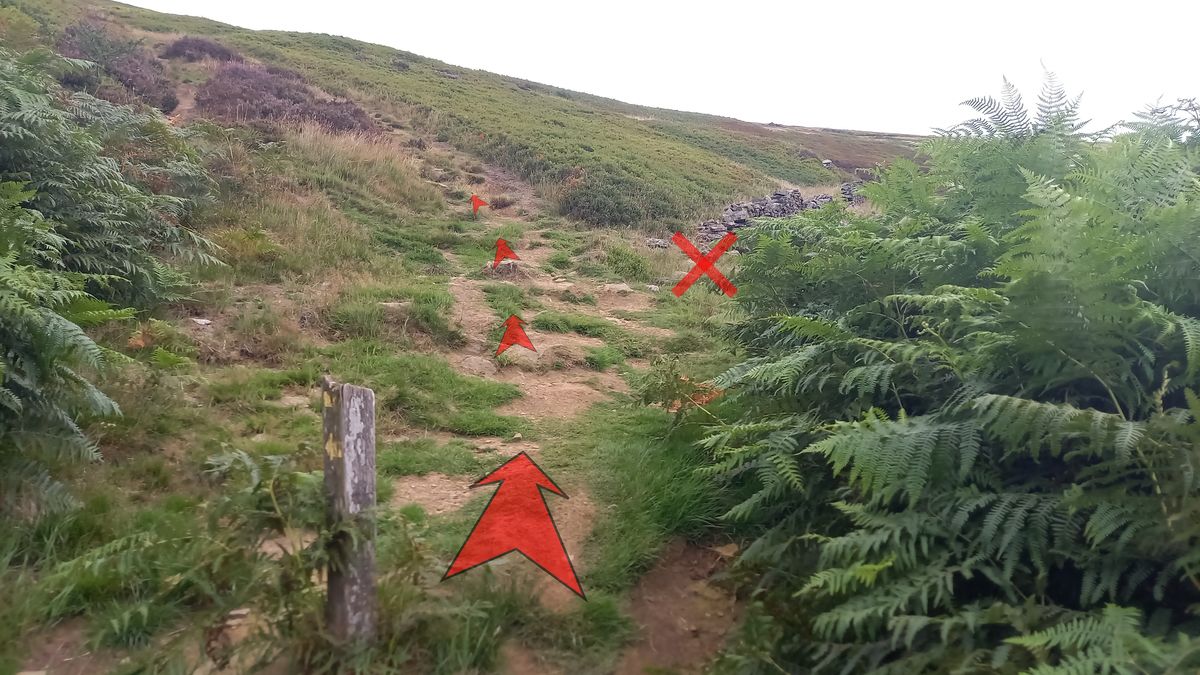
Further up the hill, the path swings back to the left. Make sure you don’t inadvertently continue in the direction of a broken-down stone wall here.
Occasional wooden posts with yellow arrows indicate the route, but the path is generally clear and easy to follow.

-
About ½ a kilometre from the wooden gate, the path steepens again and passes through a small rocky gully.
You’ve almost reached the top of the steepest section of path now!
-
Just beyond the rocky gully, the path meets a broader path at a crossroads marked by a large stone cairn (pile of rocks). Another Peak and Northern Footpaths Society sign (no. 471) indicates the destinations available from here.
You’ll be turning right (in the direction of “Ashopton”) rather than continuing directly up hill, but it’s worth taking a break here to take in the excellent views.


Stage 2: Above Walker's Clough to Fairholmes
-
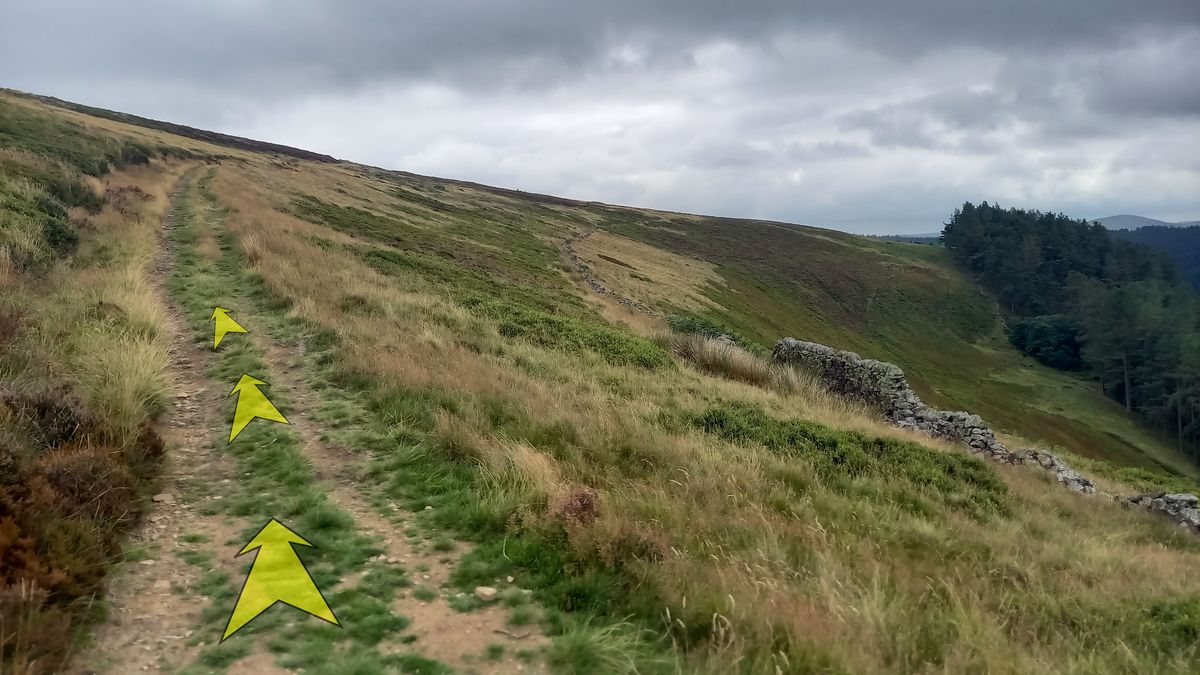
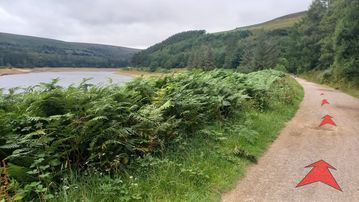
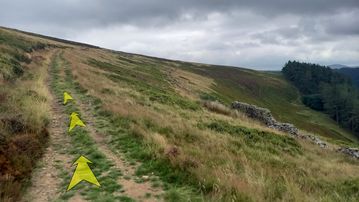
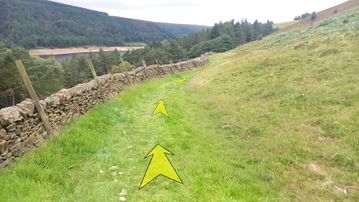
Turn right at the cairn, and follow the grassy path as it gently climbs across the hillside.
-
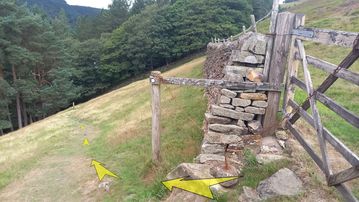
After about ½ a kilometre, the path levels out and you’ll reach a fence and wooden gate at a path junction.
Go through the gate and continue in the same direction (ignore the wooden post with a yellow arrow pointing left).
-
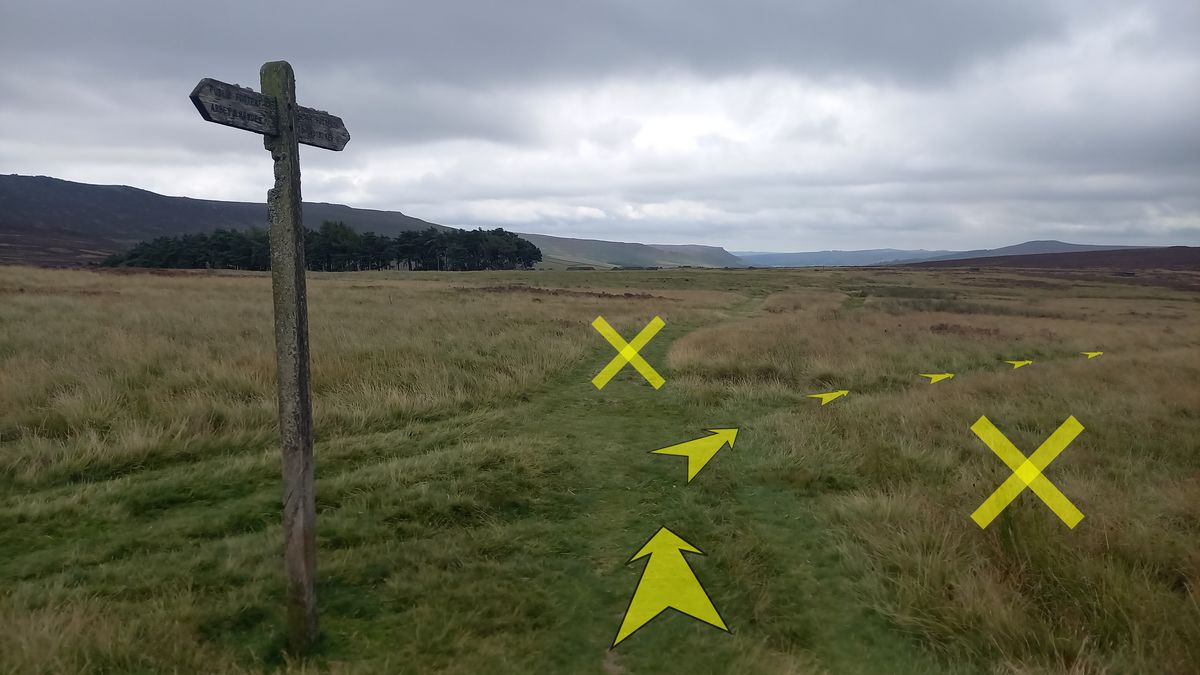
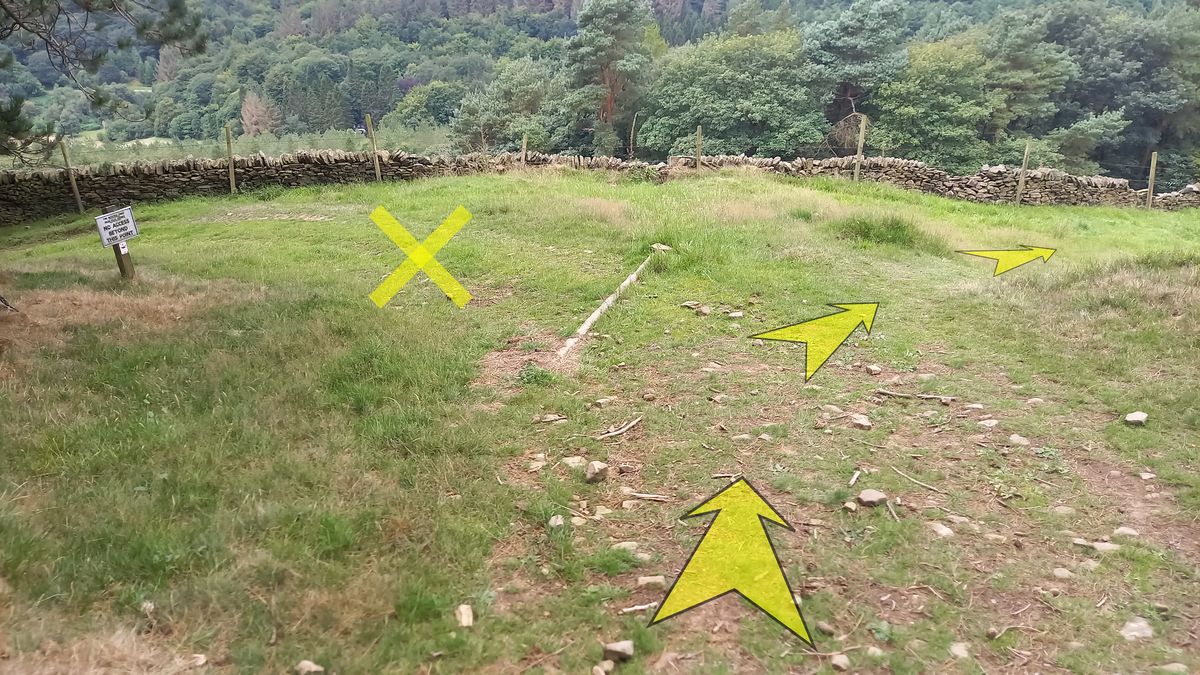
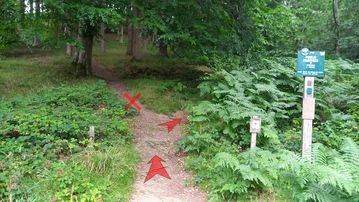
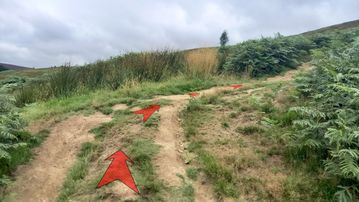
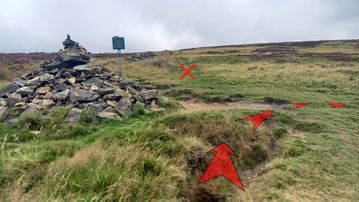
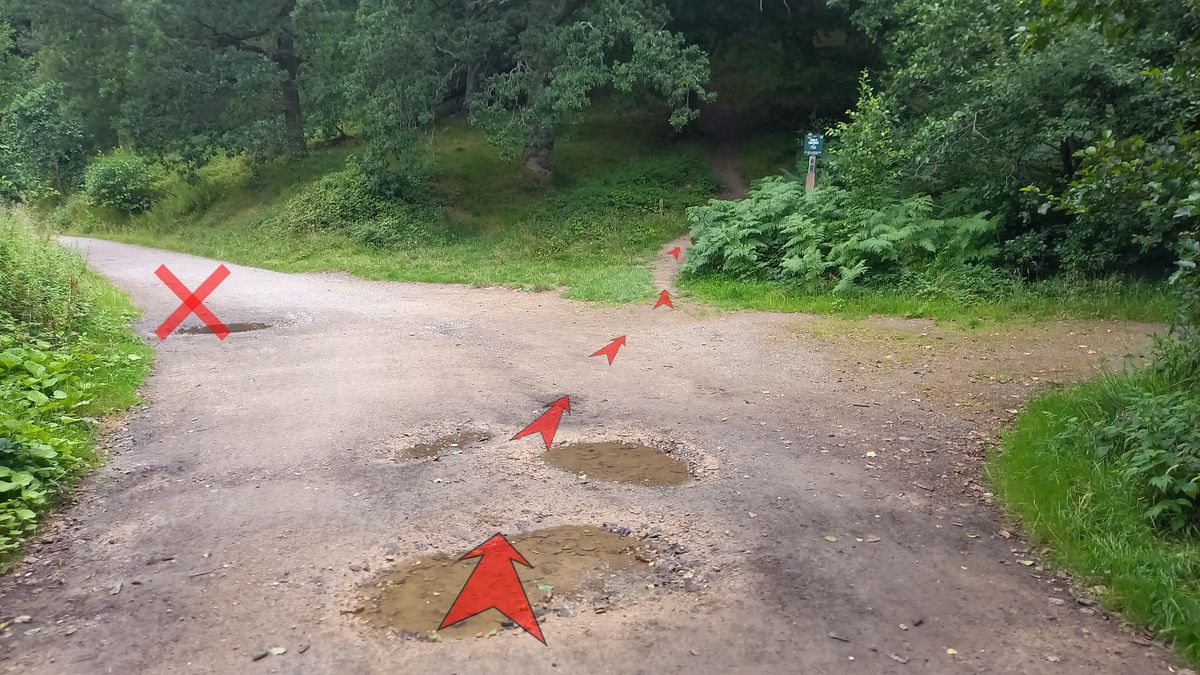
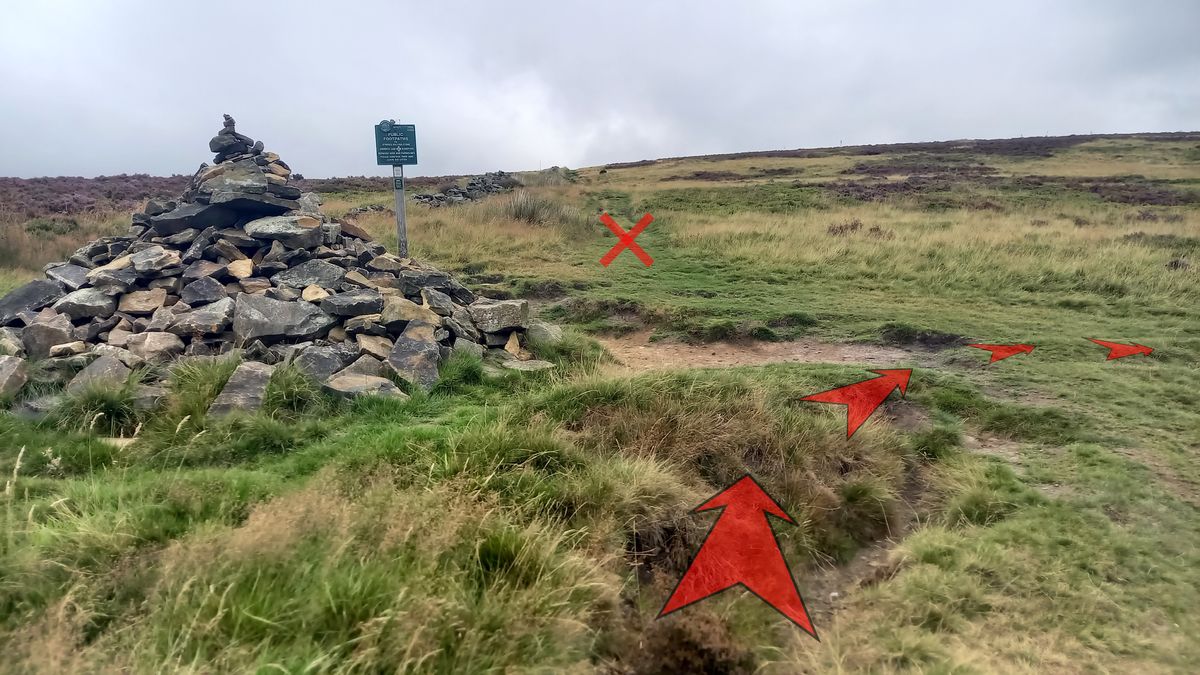
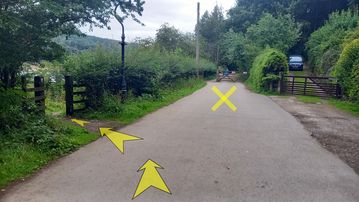
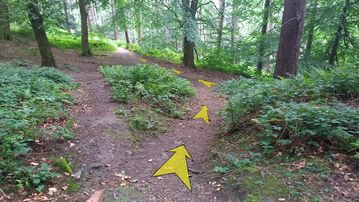
About 250 metres further on (now heading slightly down hill), you’ll reach another path junction with a wooden fingerpost (pointing “To Ladybower” in the direction you’ve been travelling).
Rather than continuing straight-on here, turn half-right onto an indistinct grassy path as shown by the arrows in the photo.
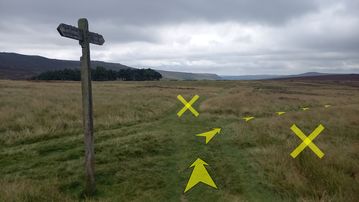
-
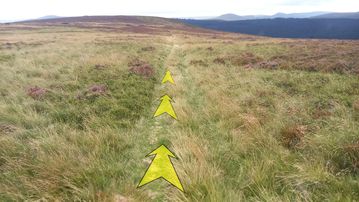
Follow the grassy path as it crosses the moor.
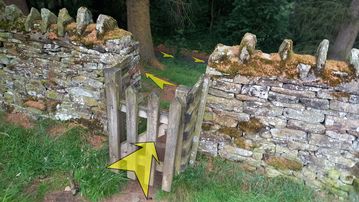
After a couple of hundred metres, the path passes over a broken-down stone wall.
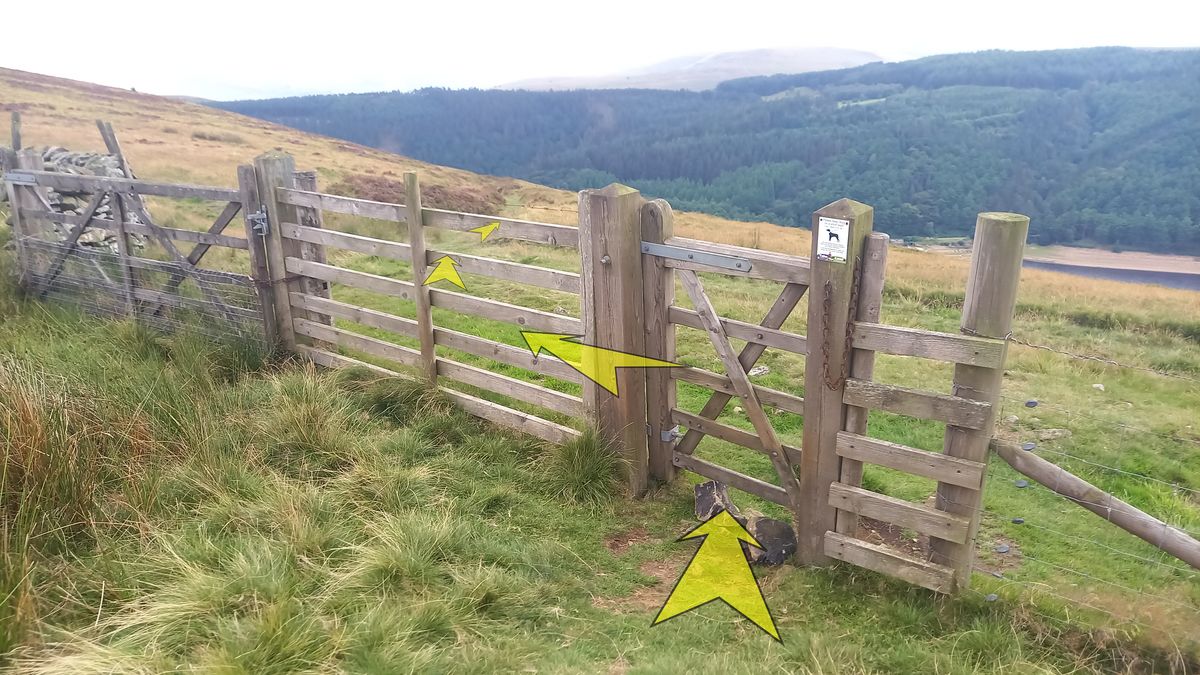
Continue to follow the path until you reach a fence and a pair of wooden gates (about 400 metres from the wooden fingerpost).
-
Pass through the gate, and cross the broader path that follows the fenceline to pick up a continuation of the grassy path you’ve been following.
This track now becomes much clearer as it starts to descend off the hills, and back down into the Upper Derwent Valley.

-
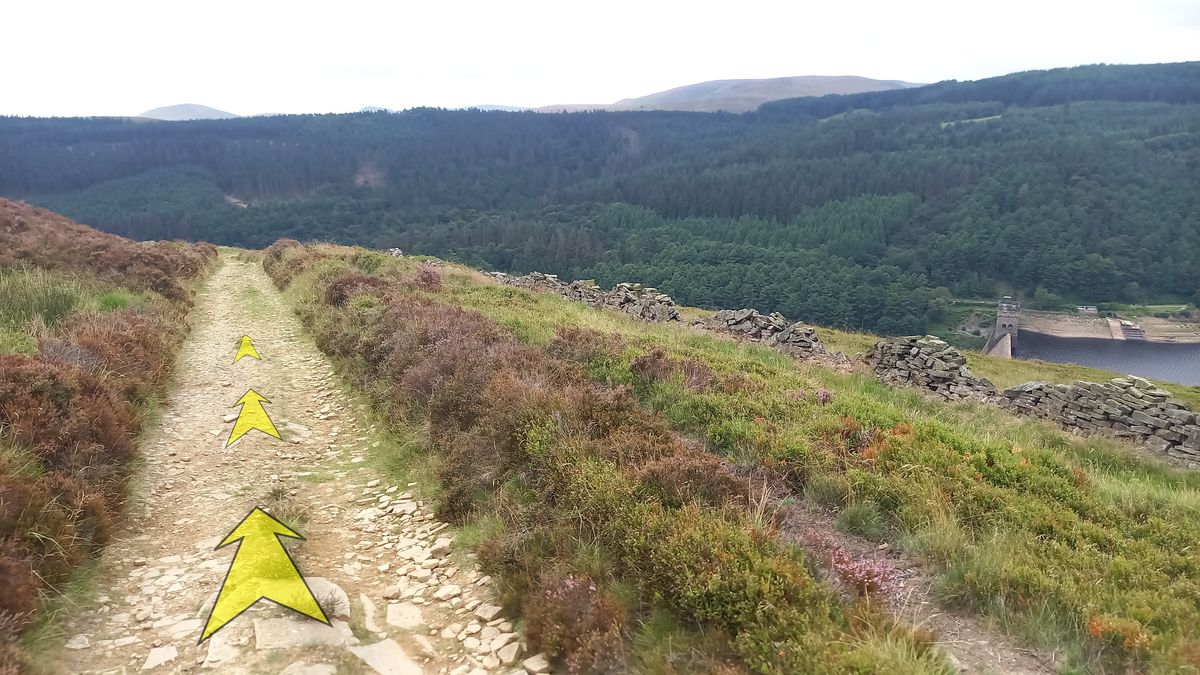
The track is now easy to follow, and is cut slightly down into the moor.
The surface becomes more rocky as you continue to lose height, with great views out to the Derwent Dam to the right.

-
About ½ a kilometre from the wooden gates, the track enters a small plantation before curving round to the right.
-
As the track approaches a stone wall ahead, you’ll see a National Trust sign to your left indicating that there’s “No Access Beyond This Point”.
Bear right away from the sign.

-
The path, now grassy, follows alongside the stone wall to your left, losing height very gradually.
You’ll pass a short wooden marker post (with a green roundel and arrow indicating that you are following a Concessionary Path), and then reach a wooden gate in the stone wall – about 200 metres from the “No Access” sign.
-
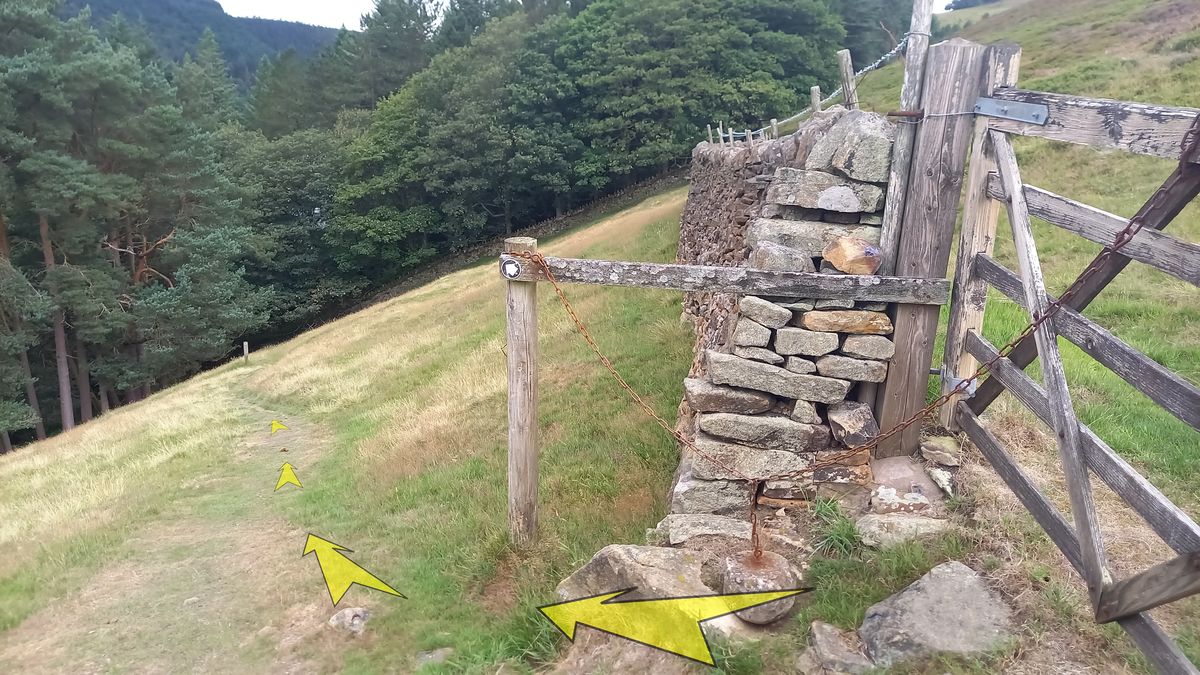
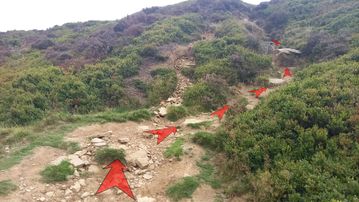
Go through the wooden gate, and immediately turn right to follow the narrow grassy path fairly steeply down hill.
The path loses height quickly as it zigzags down the steep grassy hillside – a couple of wooden marker posts with arrows confirm the way.
-
At the foot of the slope you’ll reach a stone wall with a small wooden gate.
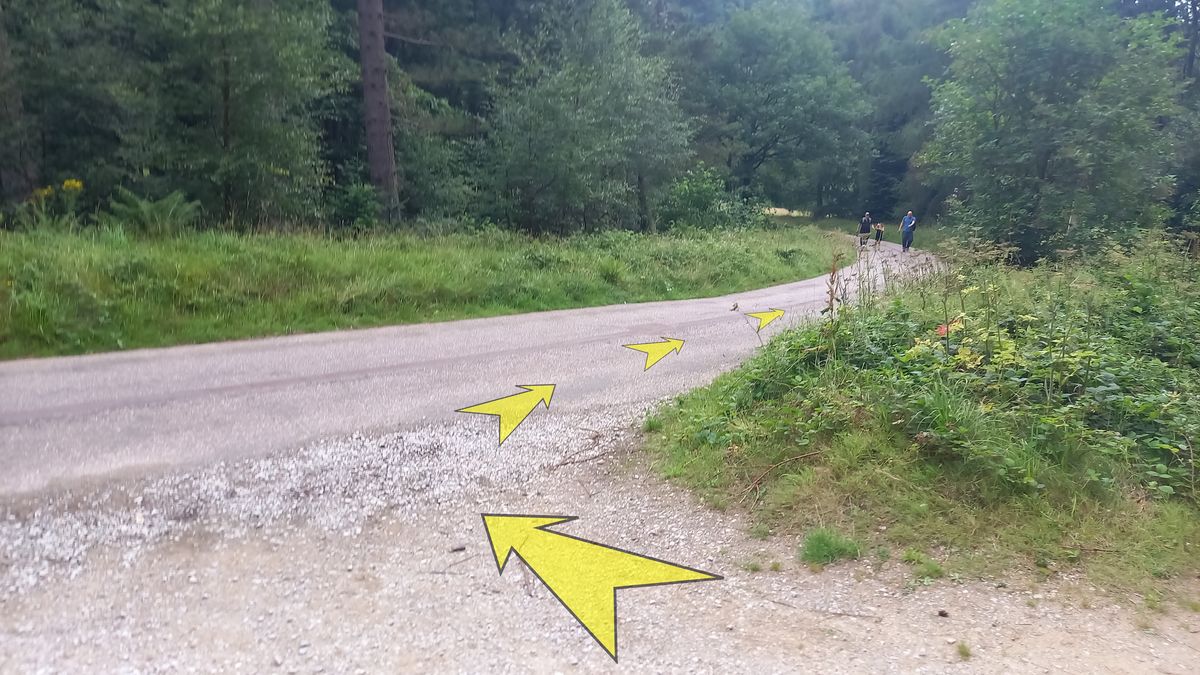
Go through the gate and head left to make your way down an earthy bank through trees to join the road.
Turn right onto the road, and follow it – heading slightly up hill – for about 200 metres.
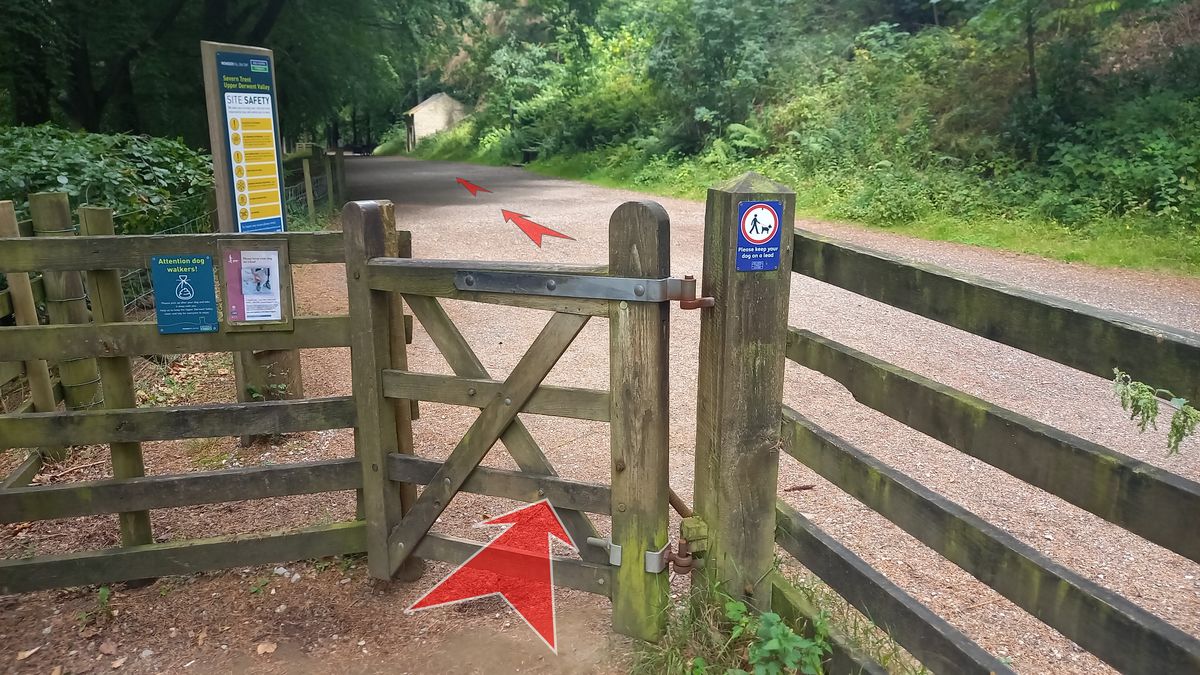
-
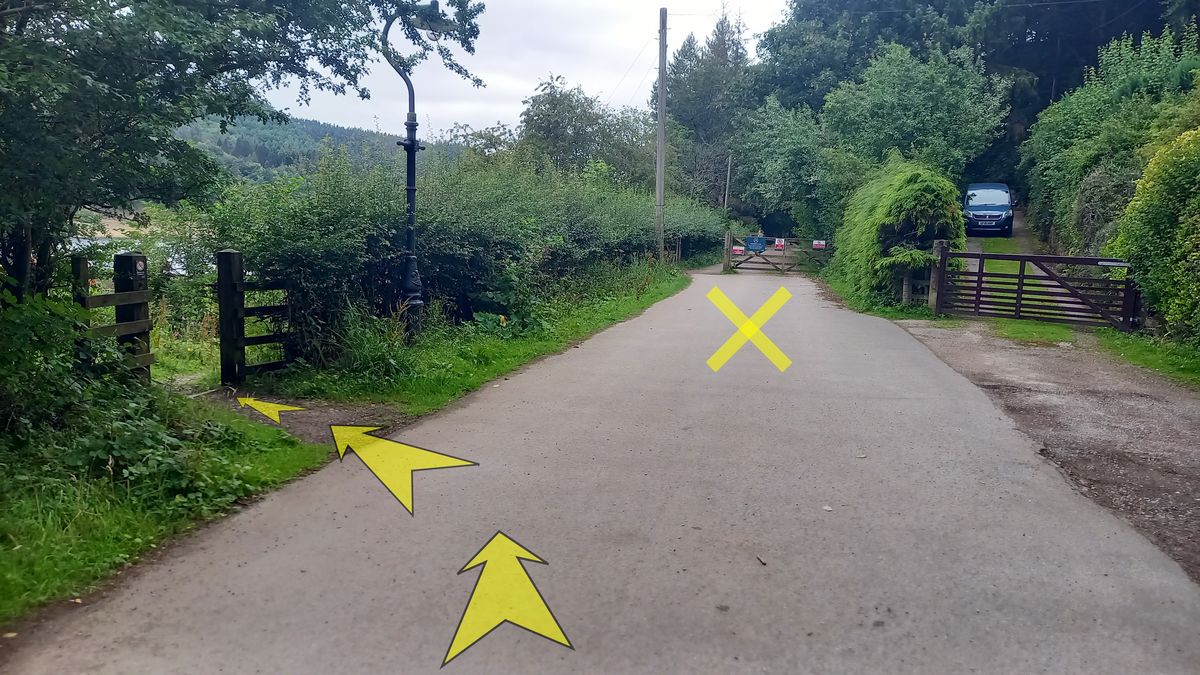
A wooden gate across the road ahead (and a gated private driveway to the right) marks the point where you should turn left off the road and pass through a small wooden gate.
-
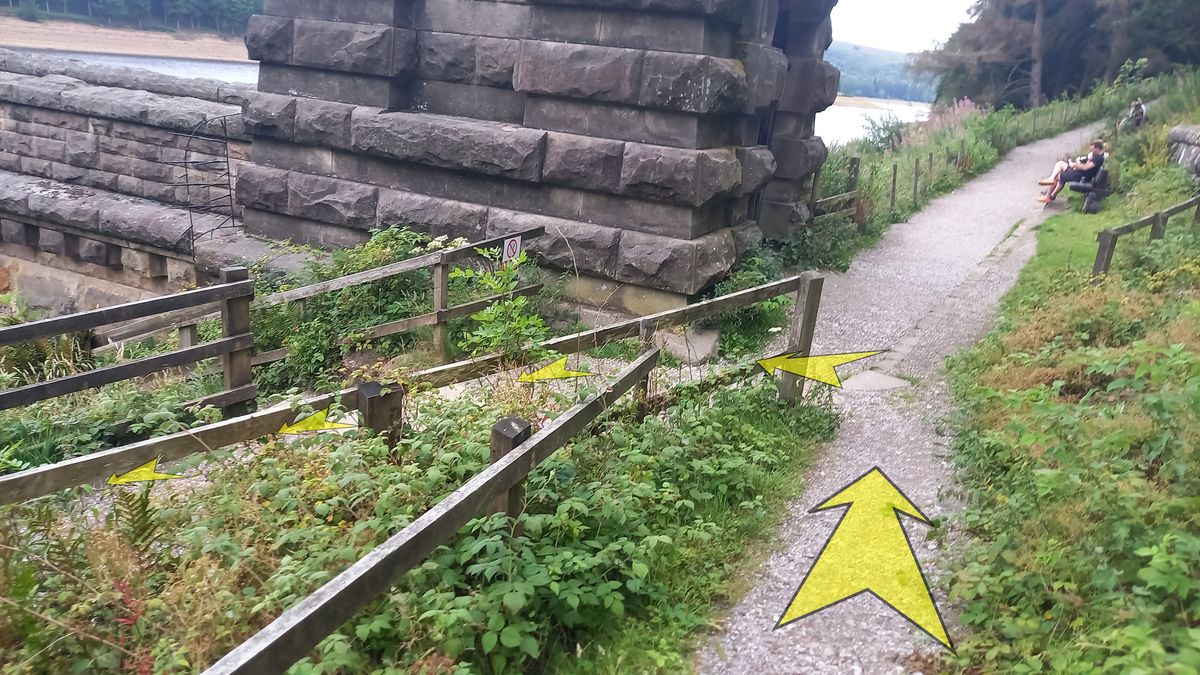
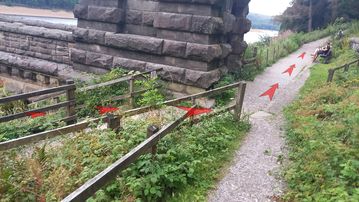
Follow the track to the right from the gate, and you’ll soon find yourself back at the East Tower of Derwent Dam.
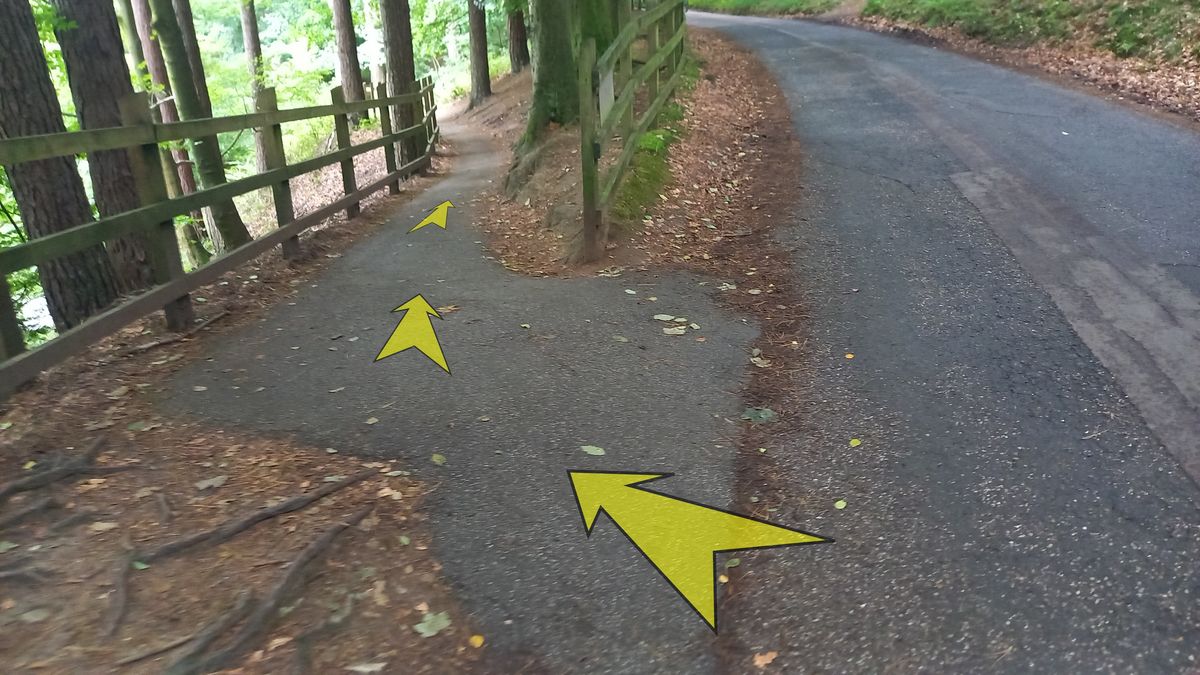
From here you could reverse your route from earlier, and walk down the steps to the base of the dam wall, but as an alternative, ignore the steps and turn back on yourself to the left instead, following a gravel path.
-
At the first zigzag, continue straight on into the woodland on an earthy track (rather than heading back right towards the dam).
Continue to follow this earthy path down hill through the woodland until you reach a bigger path.
Turn left onto the bigger path, and follow it through the woodland – now on the level.
-
After about 150 metres, you’ll reach another road.
Turn right onto the road, and follow it as it bends around to the left.

-
In about 200 metres you’ll reach the point at which you originally left the road to head over to the dam.
Continue for another 200 metres until you reach the tarmac path dropping off to the left (signposted to Fairholmes), and you’ll soon be back at the main car park.