Burbage Rocks & Higger Tor Walk
Explore Burbage Rocks and Higger Tor, featuring stunning gritstone outcrops and panoramic views
About the walk
This circular walk explores the gritstone outcrops of Burbage Rocks and Higger Tor, with stunning views over the surrounding moorland and valleys. The route includes a visit to the ancient hill fort of Carl Wark, and offers opportunities for exploration among the rocky terrain.
The walk is suitable for those with a reasonable level of fitness, but care should be taken on the rougher sections and near sheer cliffs.
The route is mainly on clear tracks, but some sections may be boggy after wet weather, so sturdy footwear is recommended.
The walk can be extended by visiting Longshaw Estate or the Fox House Inn for refreshments.
Need-to-know
-
Pay & Display parking at Upper Burbage Bridge Car Park.
Parking prices, per car (last checked August 2025):
- Up to 1 hour, £2.10
- Up to 2 hours, £3.40
- Up to 4 hours, £5.50
- All day, £6.60
Payment by coins (no change given), or using the RingGo app – location 51727; charges apply every day from 9am to 6pm. Because mobile signal is poor at this location, Peak District National Park Authority allow 24 hours following your visit before paying with RingGo.
There’s public transport (bus service) to near Longshaw Estate, which is on the route of this circular walk (at step 13 in the detailed directions). See “Getting there” for more details.
- 4 miles / 6½ kilometres circular walk.
- 2½ hours at a leisurely pace.
- 600 ft (180 m) ascent and descent.
- Mixed terrain (including some rough bouldery ground, paths near the top of sheer unfenced cliffs, and possible boggy ground after wet weather); not suitable for wheelchair users or for pushchairs.
- 1 stile.
- For an optional refreshments stop, there is a cafe and public toilets at Longshaw Estate, just under a kilometre from the route of this circular walk. The Fox House Inn is also nearby, just over ½-a-kilometre from the route. Both are marked on the map below – see the purple line for the recommended walking route, and more information at step 15 of the detailed guide.
Getting there
By bus: Bus number 271 or 272 (Sheffield – Hathersage – Bradwell – Castleton) services the Hathersage Road – Burbage Bridge stop, which is where this circular walk crosses Hathersage Road. Start the walk from step 13 in the detailed directions if getting the bus to here.
You can download timetables for Derbyshire public transport from www.derbysbus.info/times
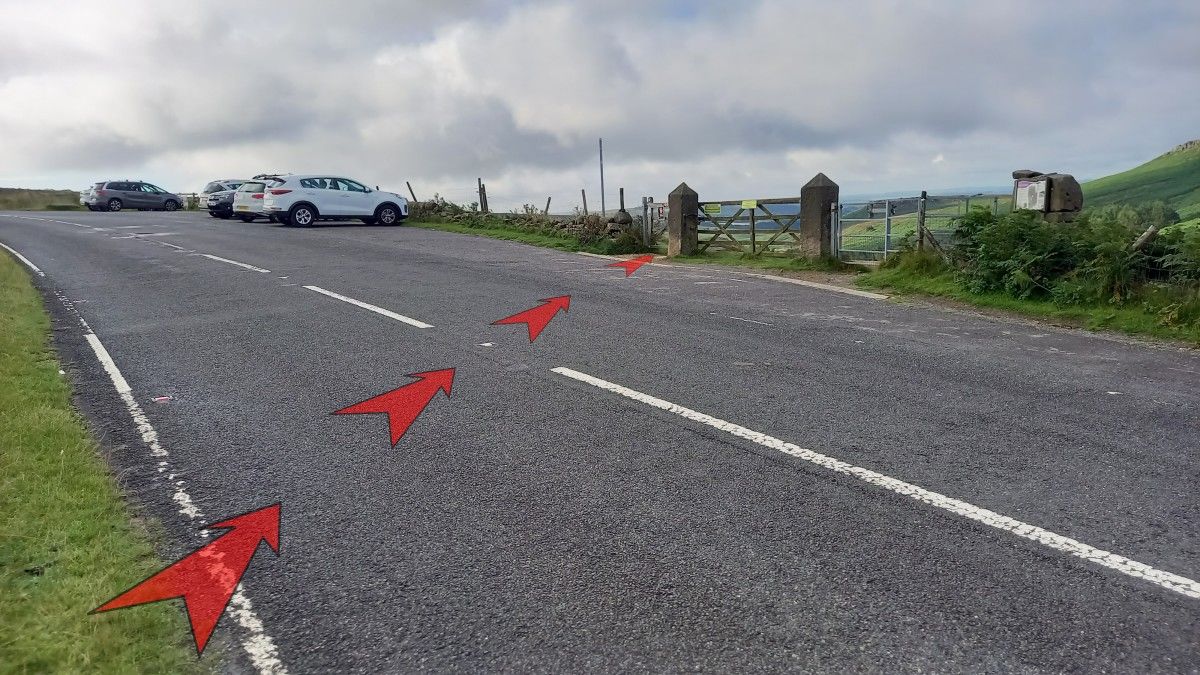
By car: Start and finish at Upper Burbage Bridge Car Park (arrowed on the following map).
See Need-to-know for detailed parking information.
The following may help if you use a satnav:
-
nearby postcode: S32 1BR (this postcode covers a wide area east of Hathersage).
For a more precise location, you should enter the name – Upper Burbage Bridge Car Park, what3words, latitude/longitude, or Ordnance Survey grid reference figures into your satnav.
- what3words: ///nurses.pitch.league
- Latitude, Longitude: 53.343, -1.609
- Ordnance Survey grid reference: SK 260 829
Map & directions
This simplified map provides guidance for the route described – the numbers refer to the numbered steps in the walk description. This map is not suitable for detailed navigation, for which you should use a copy of the relevant Ordnance Survey map.
The Ordnance Survey map covers a bigger area along with important information such as place names, official rights of way, and areas of Access Land.
For this walk, the ideal map is the Explorer Series Number OL1: The Peak District - Dark Peak Area (Kinder Scout, Bleaklow, Black Hill & Ladybower Reservoir), which includes the whole area of the walk at 1:25 000 scale (4 centimetres to 1 kilometre).

Contour interval: 10 metres; index contours, 50 metres. North at top (approximate).
Map data from OpenStreetMap (available under the Open Database Licence). Contains Ordnance Survey data © Crown copyright & database right 2010–2023.
Stage 1: Upper Burbage Bridge Car Park to Toad's Mouth Rock
-
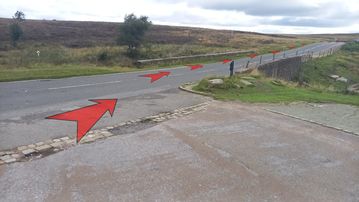
Turn right out of the car park and cross the road.
Walk along the road (crossing two bridges) for about 100 metres – there’s enough of a grassy verge on the left side of the road to avoid traffic.
-
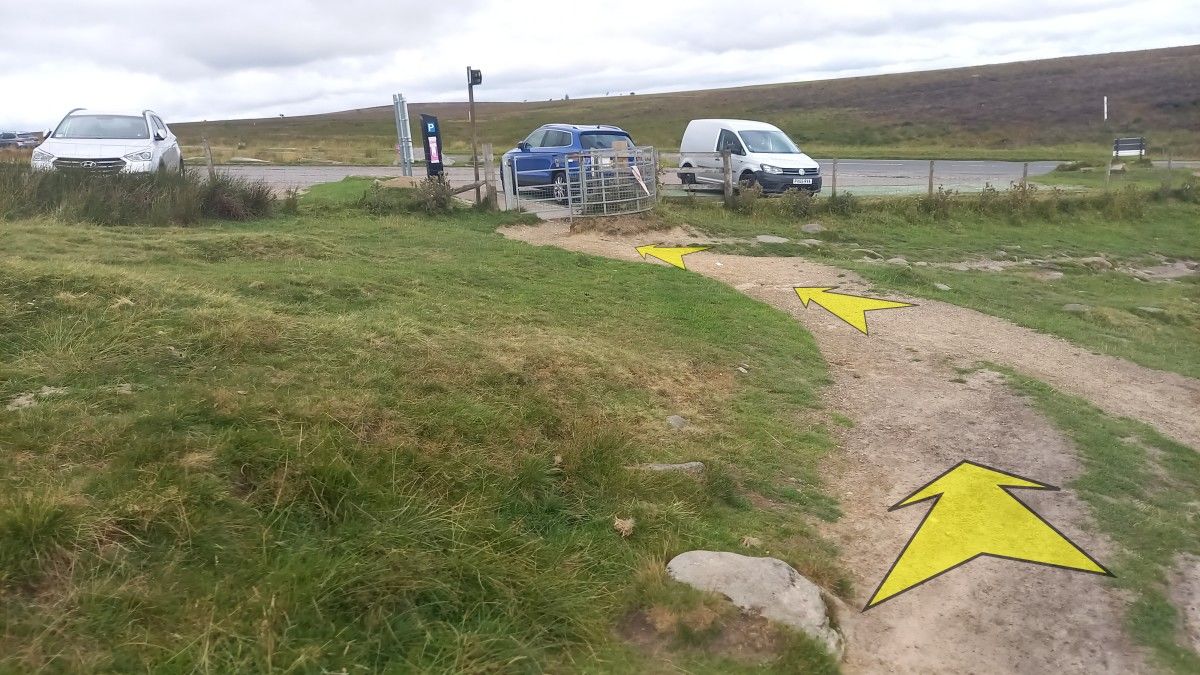
Just after the “chevron” sign, and after crossing the second bridge, cross back over the road just before a small parking area.
There’s an information board adjacent to the gates with details about the Upper Burbage area.
Go through the small wooden gate.

-
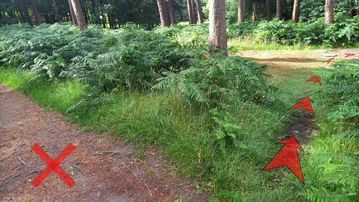
Turn left immediately after the wooden gate onto a narrow dirt path that follows the fence alongside the small parking area. DON’T continue straight-on along the much broader gravel path.
The narrow dirt path soon passes a wooden kissing gate at the far end of the parking area, and leads up onto the moorland edge along a much broader rocky path.

-
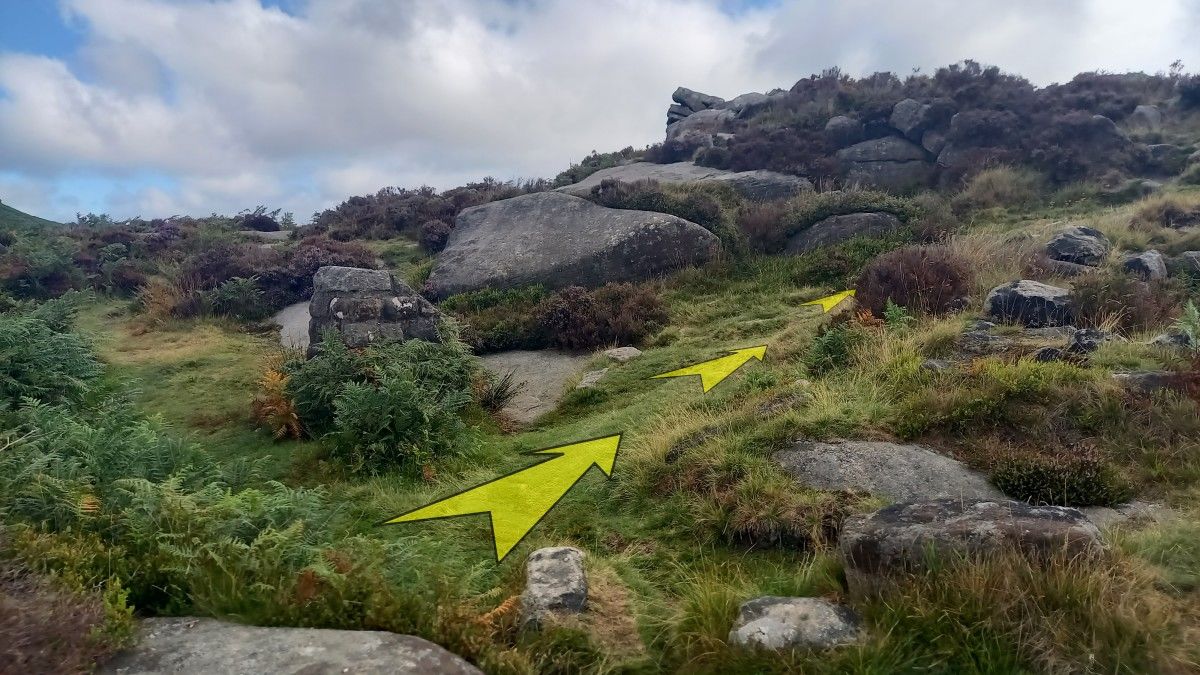
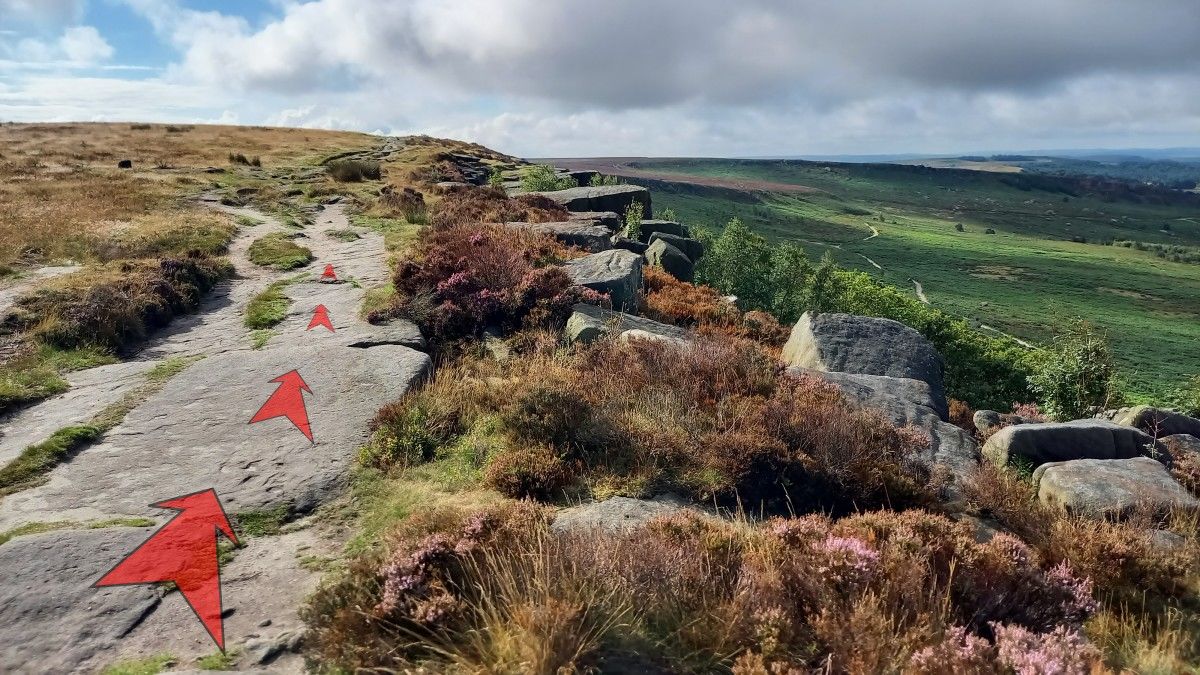
As you progress along the moorland edge, you’ll pass a white and yellow “GAS” pipeline marker.
Optionally, you can take a path closer to the top of the rock outcrops to your right (Burbage Rocks), which’ll rejoin with the main path further along.
Take care if exploring close to the top of the rocks as there is no fence, and the drop is sheer in many places.
-
Assuming you took the main path slightly away from the top of the rocks, you’ll pass a junction with a smaller dirt track on the left (a little over ½-a-kilometer from the main car park).
Ignore this, and continue along the main path.

-
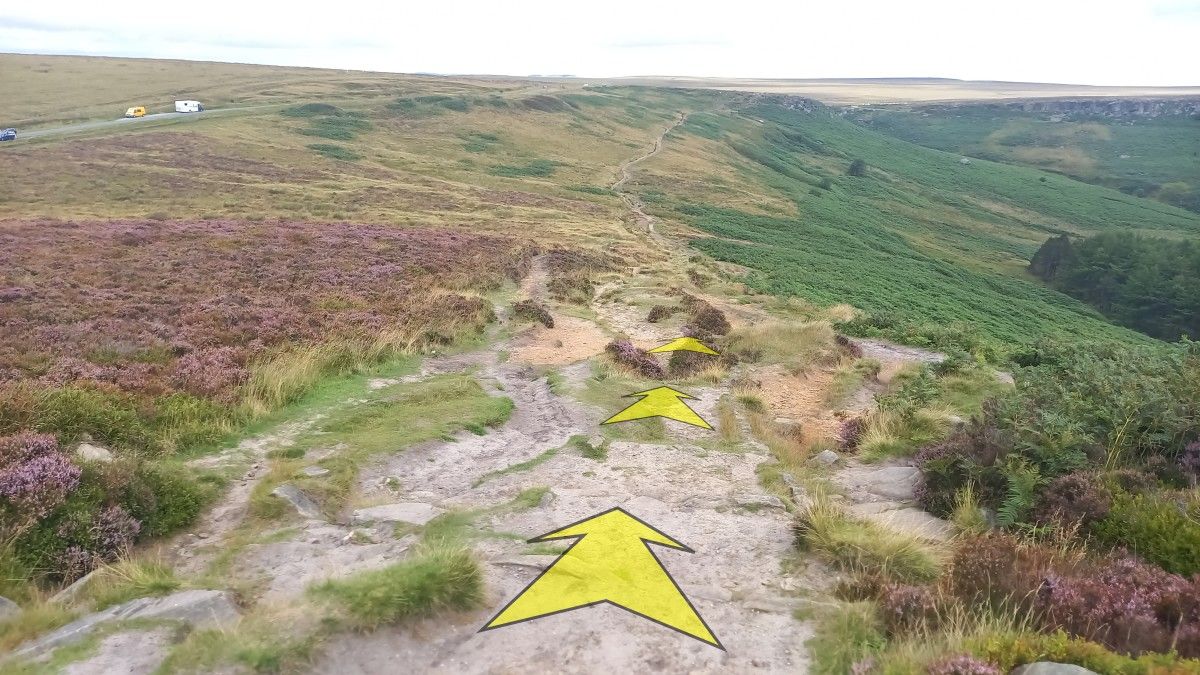
Continue along the main path, still climbing gently along the edge of Burbage Moor.
You’ll notice a small plantation down below and to your right, as well as magnificent views right out over Burbage Brook and across to Carl Wark and Higger Tor. If it’s reasonably clear, you should be able to see more distant hills too.

-
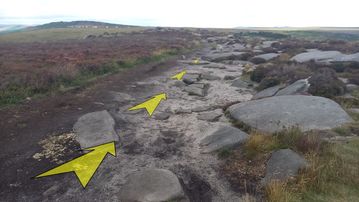
The next section of path is quite rocky in places.
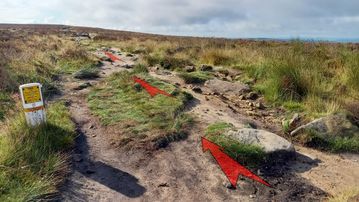
Not long after you’ve passed the end of the plantation below, the path descends to cross a couple of streams (which’ll likely be dry in summer) and then reaches a crossroads with another large path in a dip – just over ½-a-kilometer from the end of the plantation. A large cairn (pile of rocks) marks the junction.
Ignore the crossing path, and continue on up a short rise ahead, back onto the edge path above the rocks
-
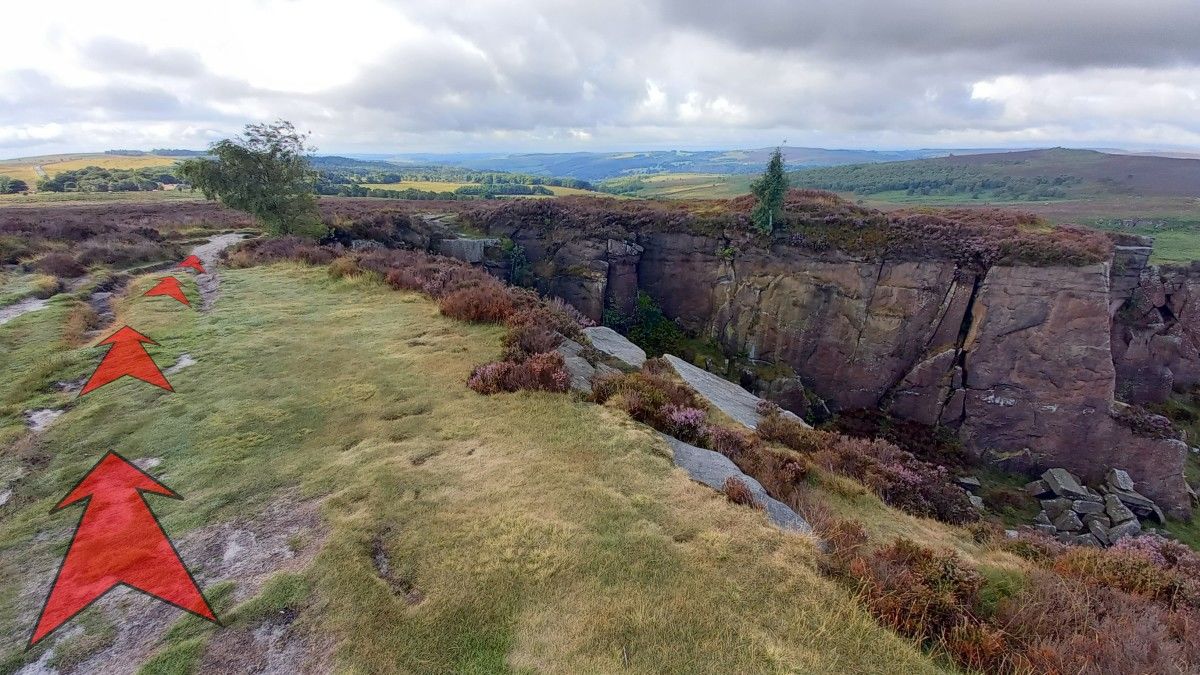
Another ½-a-kilometer further on, you’ll notice a disused quarry to your right, with very sheer rock walls.
The edge path passes close to the top edge of these cliffs (take care… unfenced!) near a small tree.

-
The path now starts to descend gradually, and after about 50 metres reaches a junction with another path coming in from the left.
Bear right here to stay on the main path, which continues its descent.

-
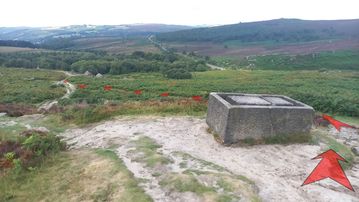
200 metres further on, and lower down, you’ll pass a large carved-stone block. This is believed to be an abandoned water trough in-the-making, which suffered a crack during carving and was never completed.
Pass to the right of the trough, and continue on down to reach a much broader level path onto which you should bear left.
-
Continue along this broader, gently curving path, as it gradually makes its way towards the road ahead.

-
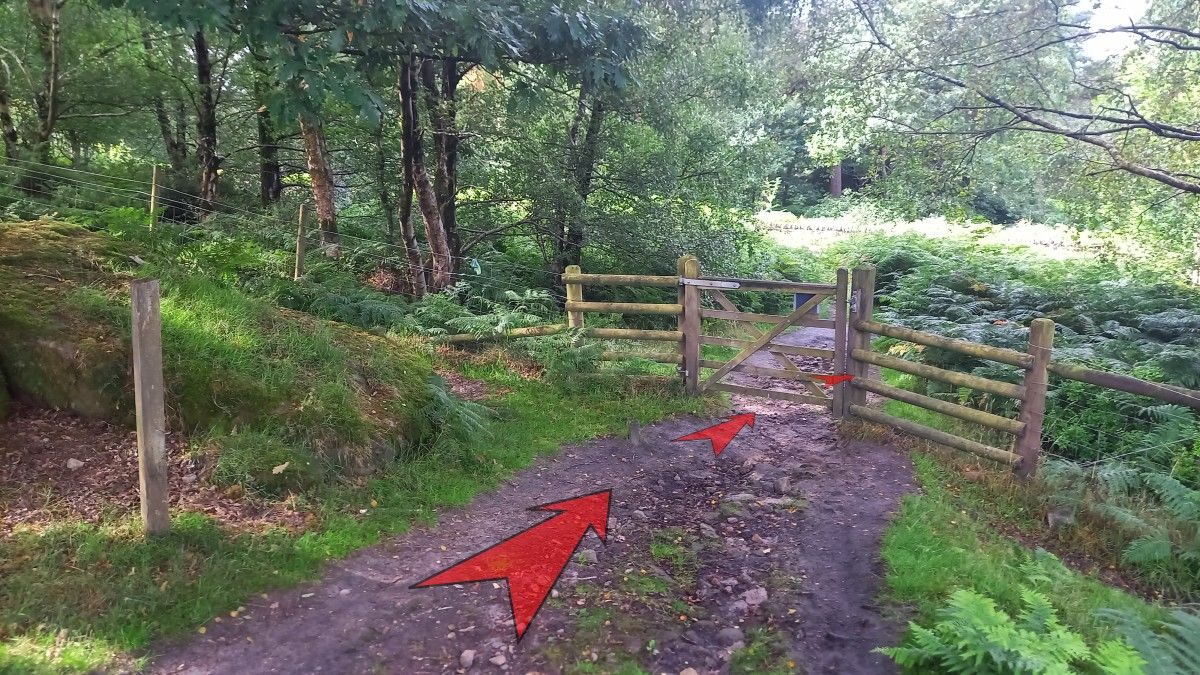
Just short of the road (and about 300 metres from the trough), you’ll reach a wooden gate.
Pass through the gate, then turn almost immediately right on a narrow dirt/rock path, which soon reaches the road.

-
Cross directly over the road, and go through the wooden gate.
A sign here marks the boundary of the National Trust’s Longshaw Estate.
NOTE: If arriving to do this walk by bus, this road crossing is where the bus stop is located (stop is named “Hathersage Road – Burbage Bridge”). Proceed to follow the detailed guide as far as step 39 (Upper Burbage Edge Car Park), then return to this point by following steps 1 through 13.
-
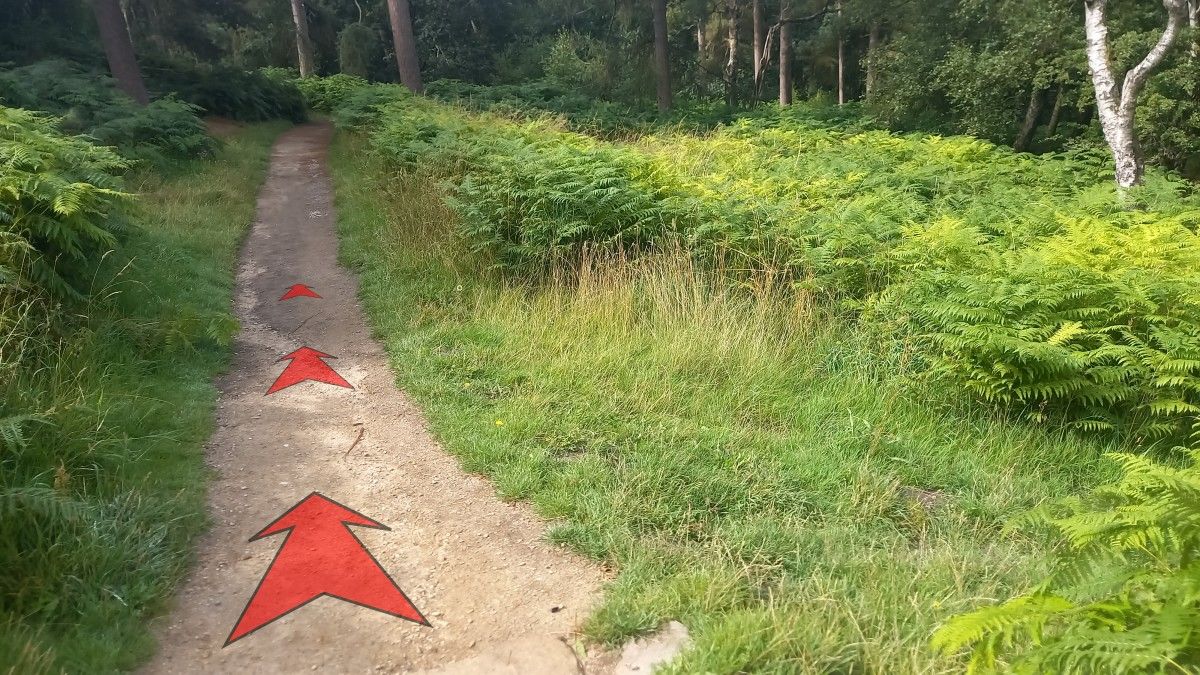
Once through the gate, ignore a grassy path to your right, and continue along the flat dirt track.

-
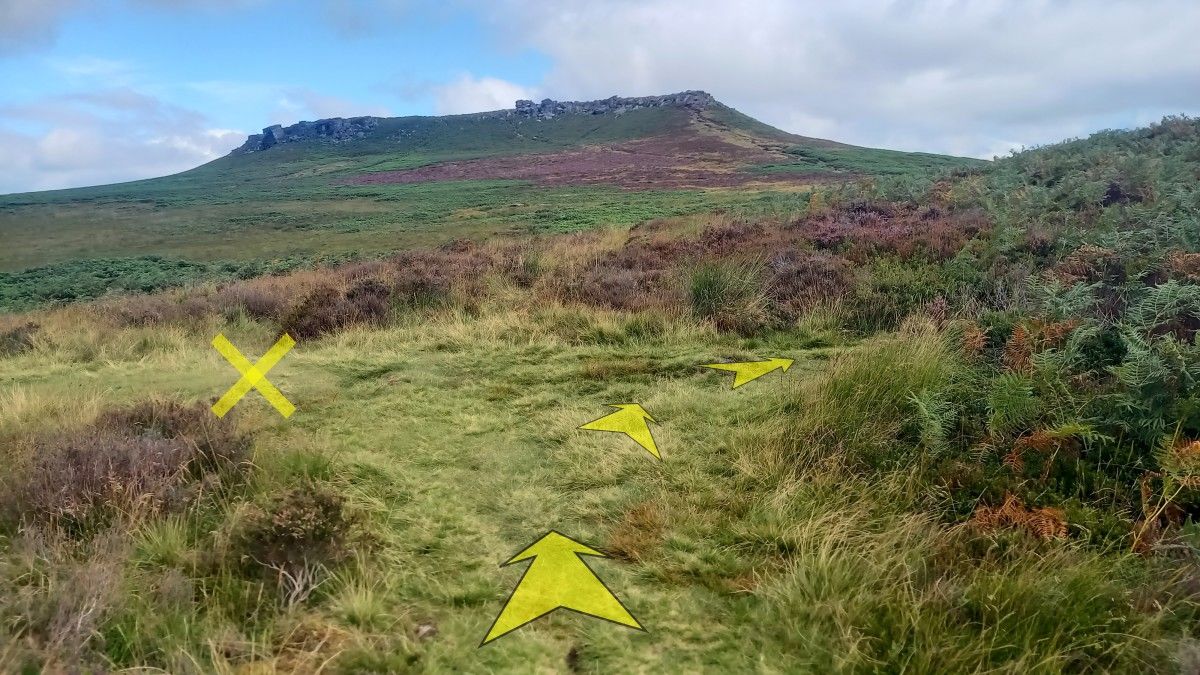
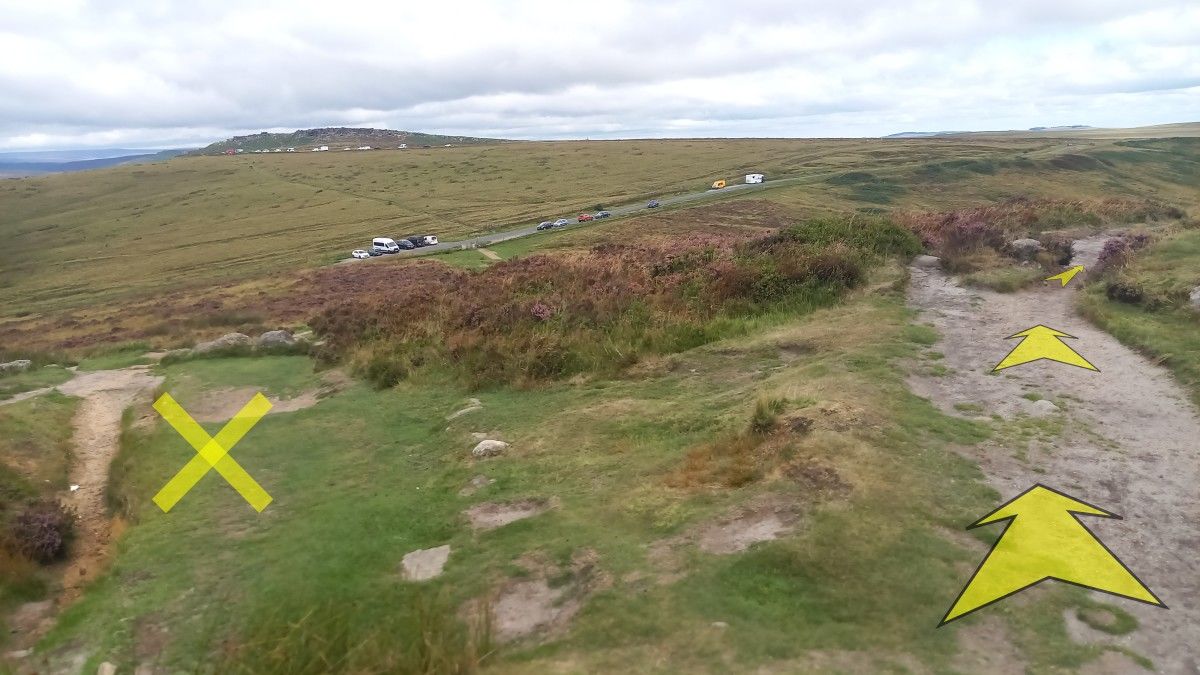
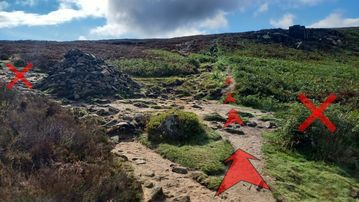
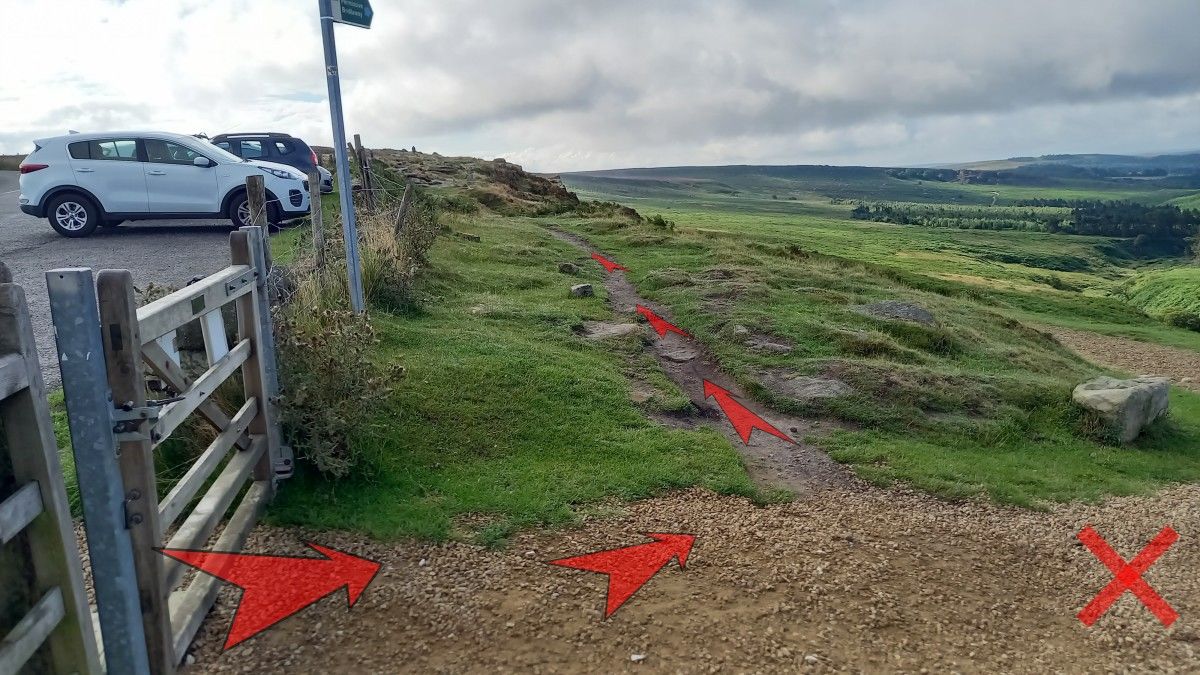
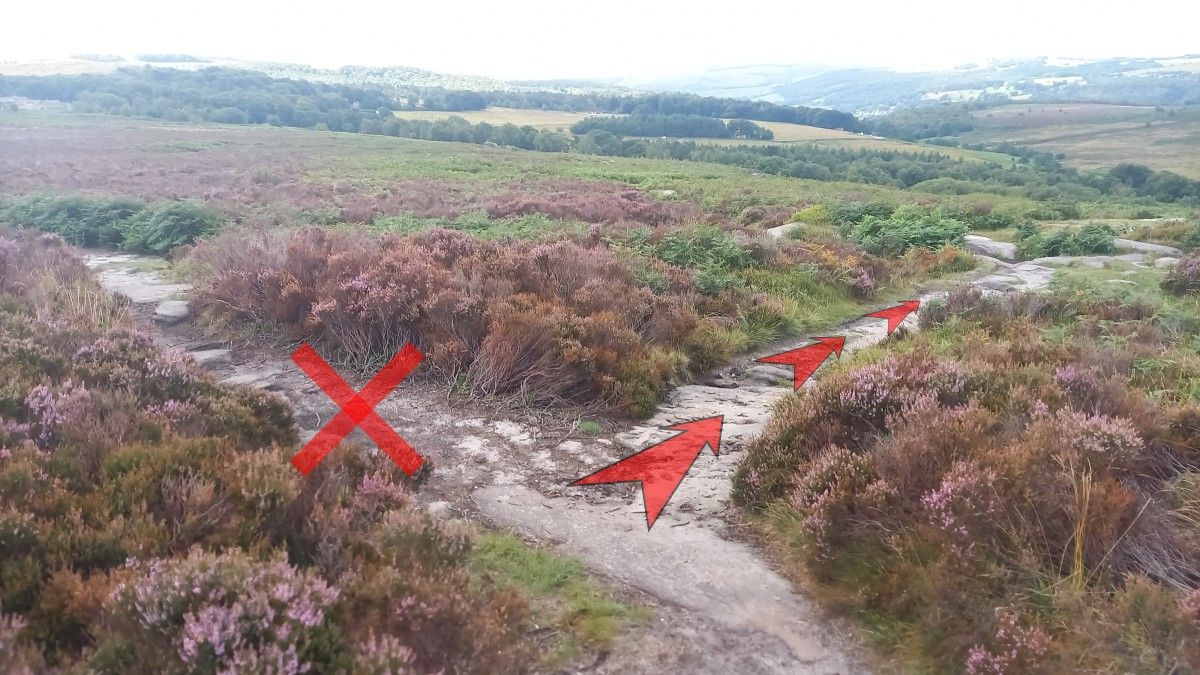
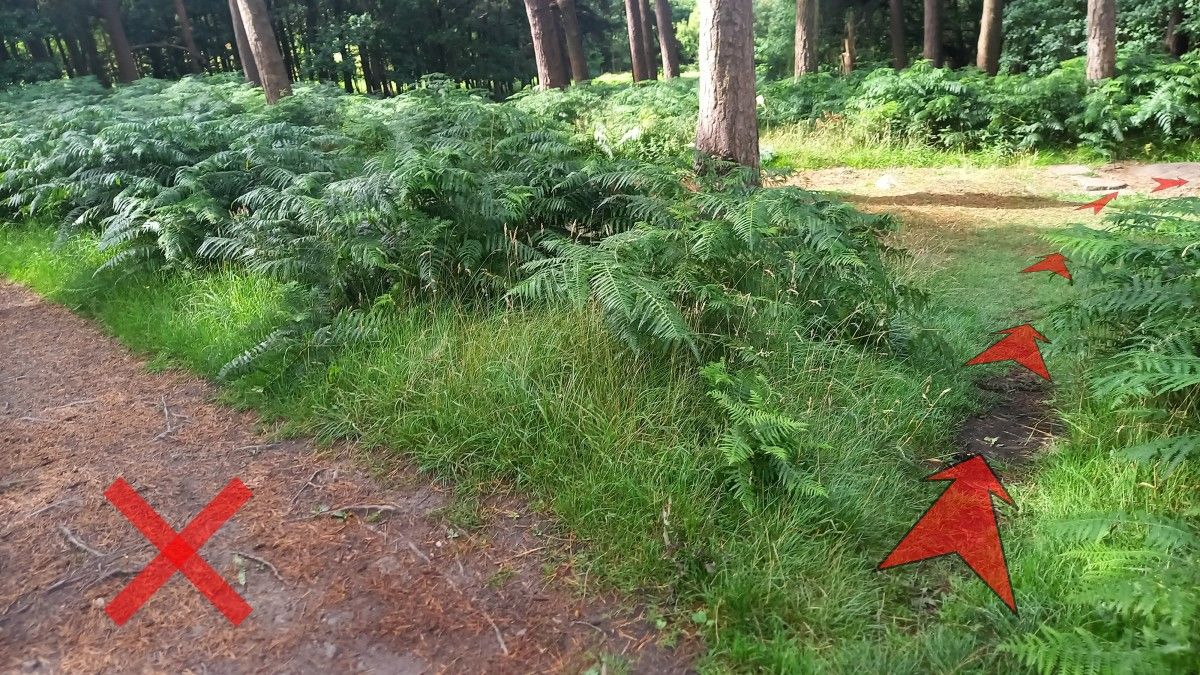
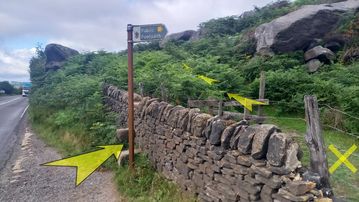
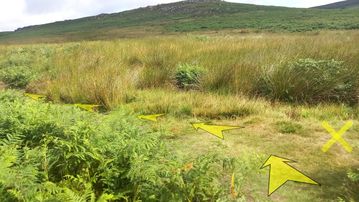
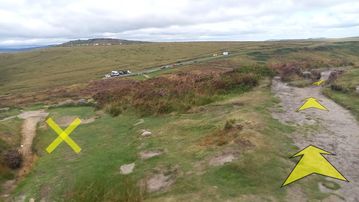
In about 100 metres, you’ll reach a junction with a larger track.
You can cut the corner off here to bear right along the larger track.
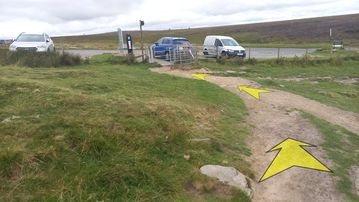
NOTE: To walk to either Longshaw Cafe (and toilets) or to the Fox House Inn, bear left onto main track (in the direction of the red cross on the photo). The recommended walking route is marked with a purple line on the map. The Longshaw Cafe is just under a kilometre away, and the Fox House Inn is just over ½-a-kilometre’s walk from here.
-
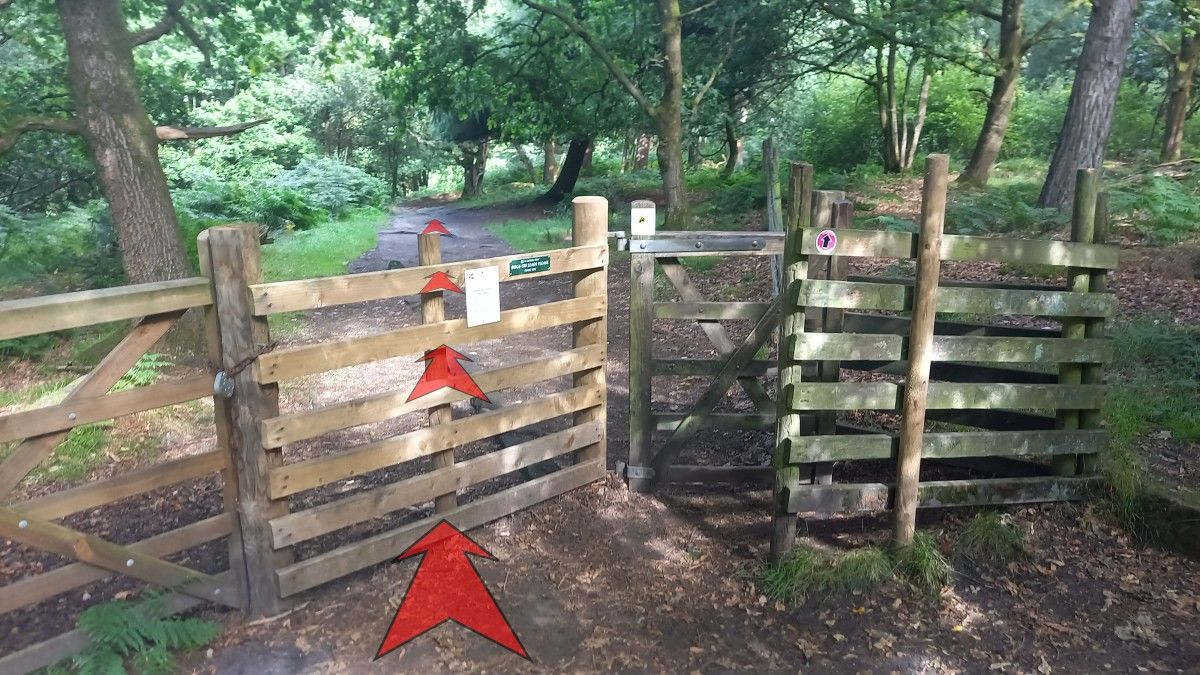
Not far along the larger track, pass through a wooden kissing gate and continue straight on.

-
Not far after the kissing gate, the track descends to a pretty area of woodland marked by numerous gritstone boulders.
Cross the small bridge over a stream onto some cobblestones.
Don’t follow the cobblestones round to the left at the corner, but instead continue straight on along a clear dirt path.

-
The dirt path bears right and starts to climb back up towards the road.
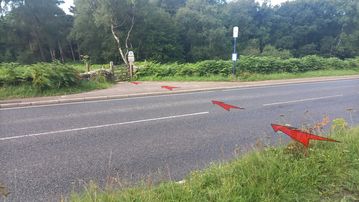
About 50 metres from the cobblestones, you’ll reach a small wooden gate that opens onto the road.
Go through the gate and cross the road. Be careful of traffic as this road can be quite busy.
On the far side of the road, head left to cross the bridge (Burbage Bridge).


Stage 2: Toad's Mouth Rock to Upper Burbage Bridge Car Park
-
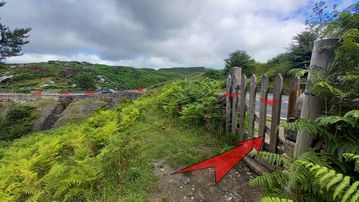
Continue a short distance beyond the bridge until you reach a “Public Footpath” sign pointing off to the right, over a dry-stone wall with a stone step-stile.
You can see Toad’s Mouth Rock directly ahead here – a large gritstone outcrop with a distinctive shape.
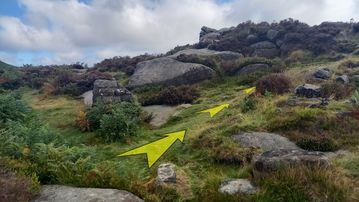
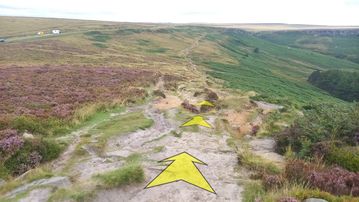
Go over the stile and bear left on a narrow path through bracken, which climbs towards a boulder.
-
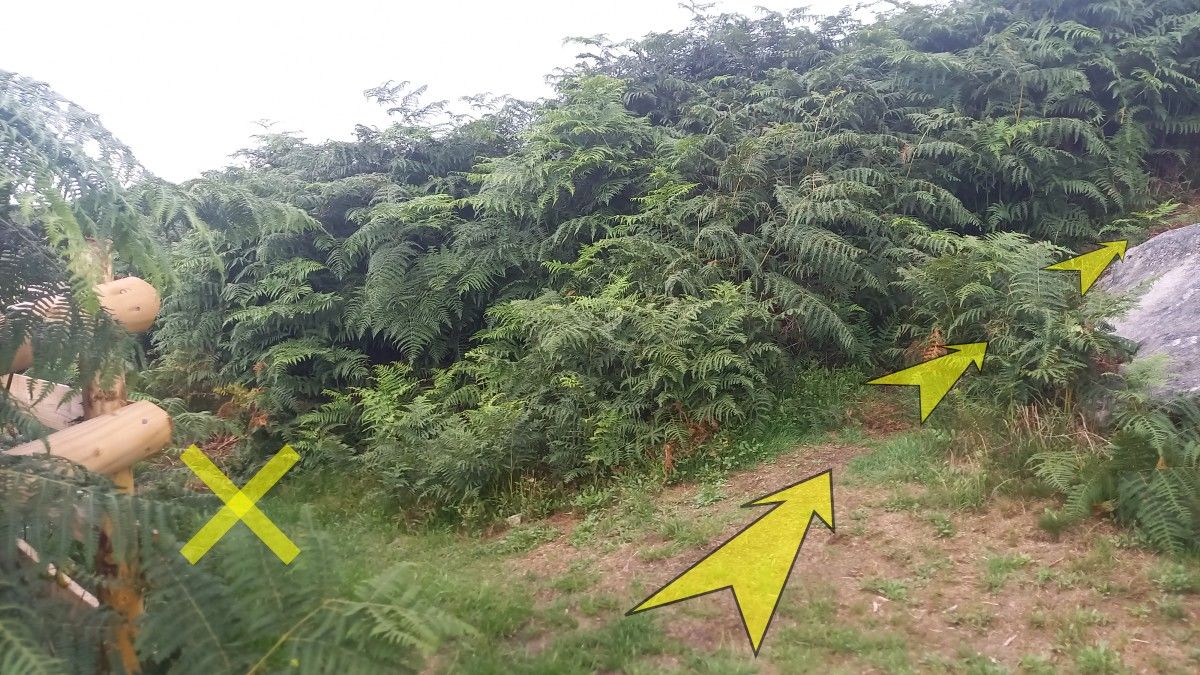
Just past the boulder, the path meets a fence corner (visible at the left of the photo).
Don’t follow the path to the left, but instead take the less distinct path ahead, uphill and into the bracken.
The path here can be quite well hidden by bracken in the late summer, and is quite rocky.

-
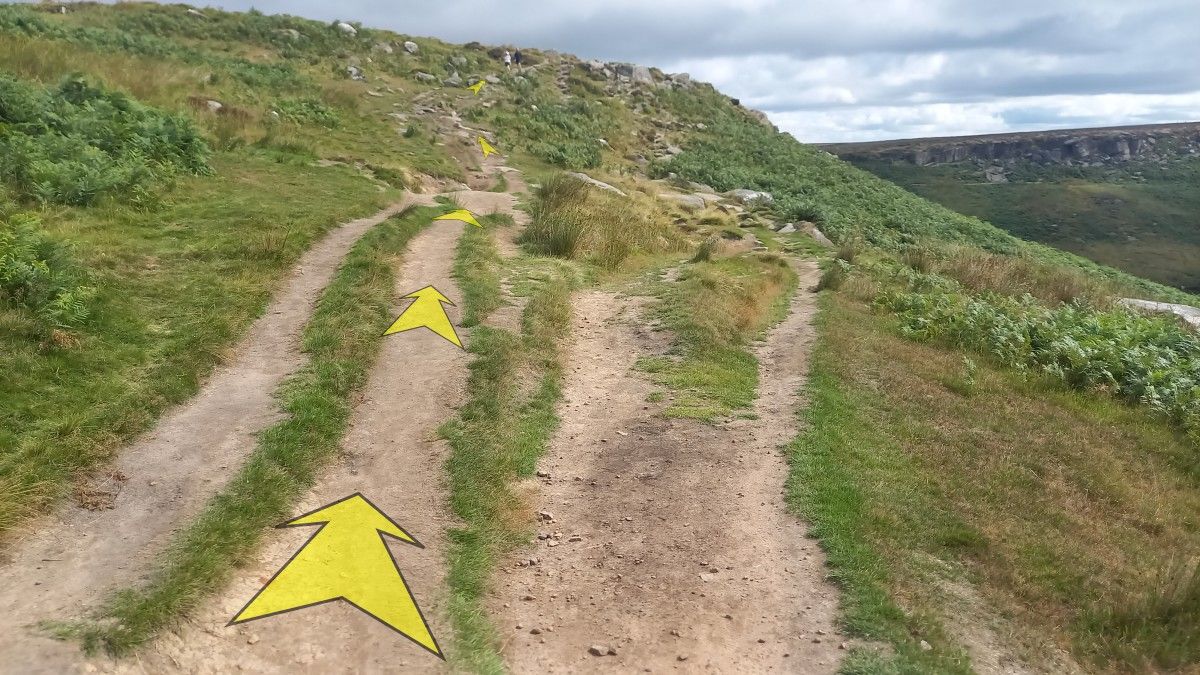
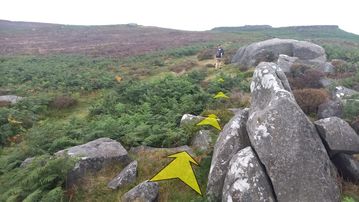
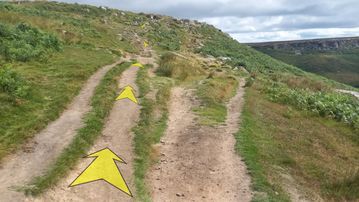
The path levels off along a short bouldery ridge. Take care of your footing here as you move along the ridge, passing a number of gritstone boulders.
-
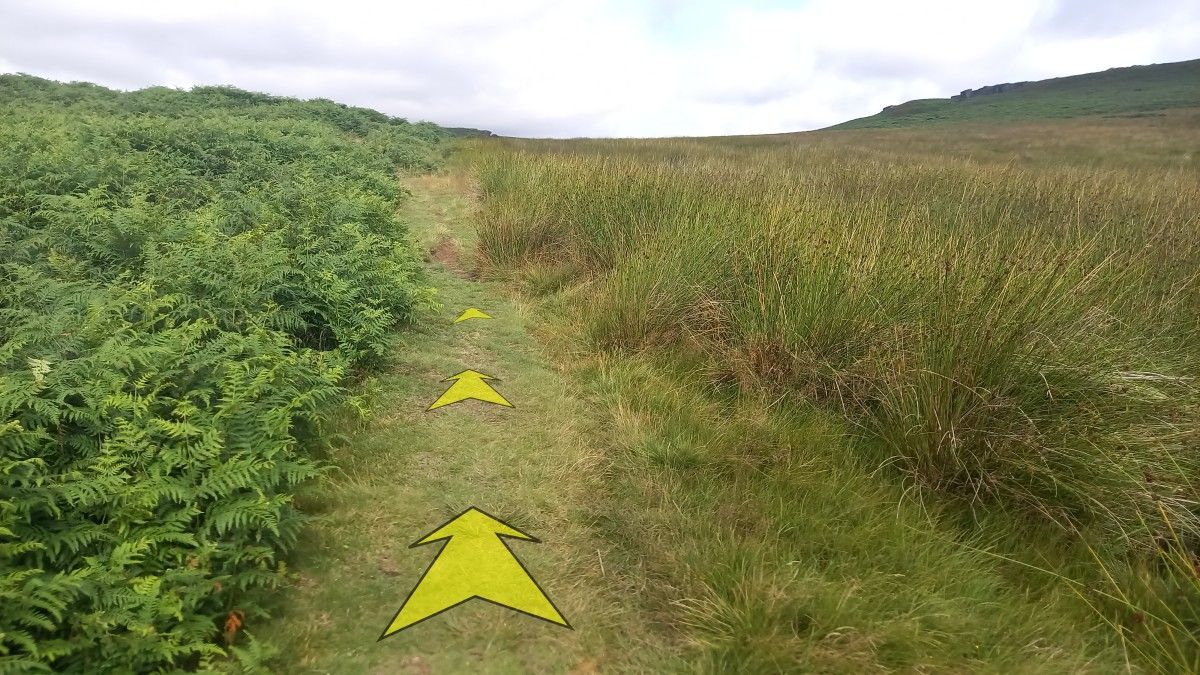
At the end of the ridge (after about 50 metres) the path descends slightly down to the left, meeting a broader grassy path.
Bear right onto this grassy path, and continue along it as it gradually ascends.
There’s an indistinct junction about 50 metres along this path, which may not be obvious. If you notice the junction, make sure you bear left to stay on the broad grassy path.
-
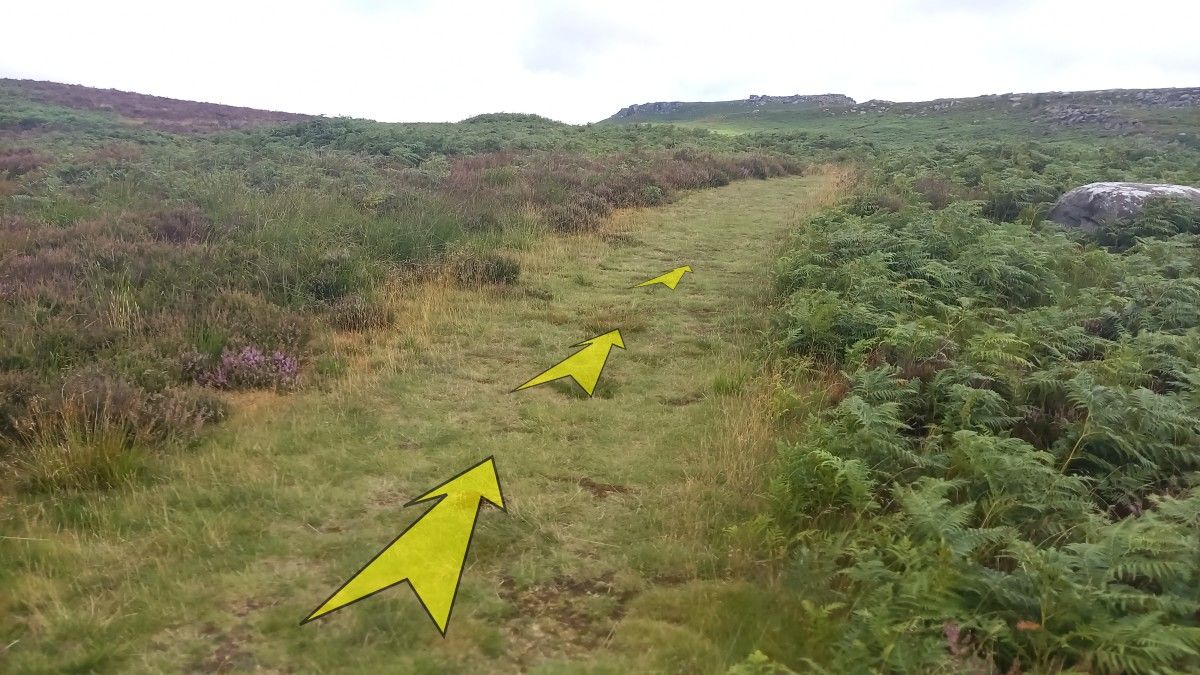
The broad grassy path continues to climb across the moorland.

-
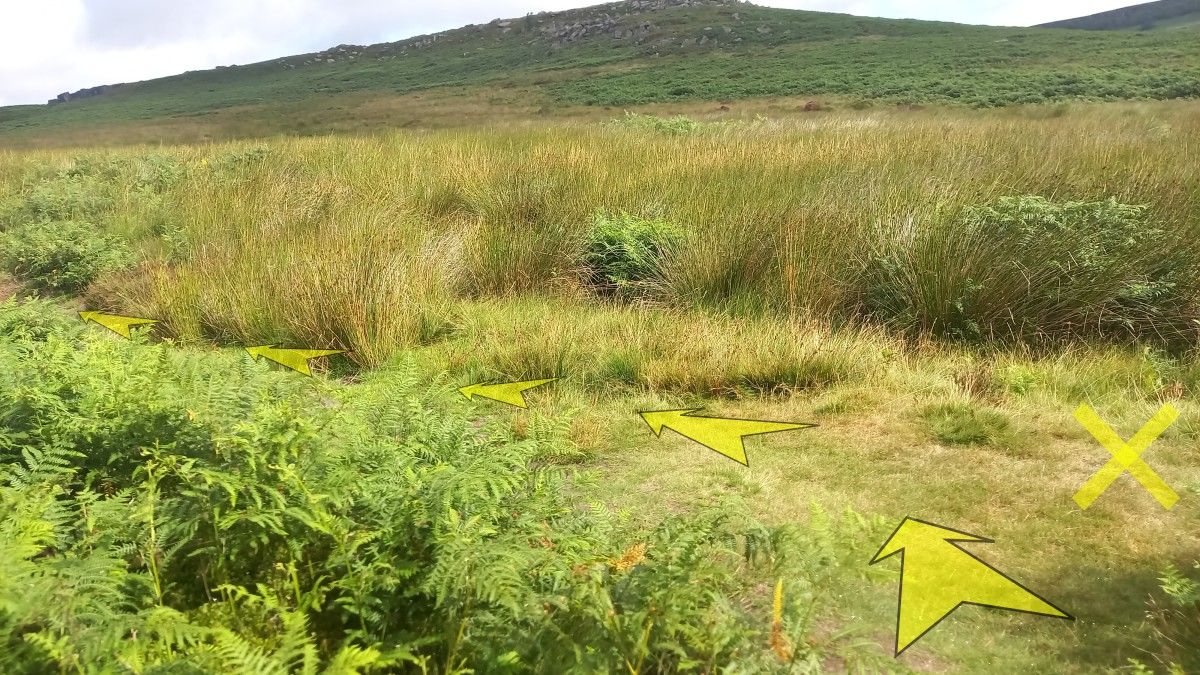
About 200 metres from the end of the ridge, the path becomes narrower and descends a little towards an area of rushes visible directly ahead.
-
As the path reaches the edge of the rushes, you’ll reach a T-junction.
Turn left here.
-
Continue along the grassy path – climbing slightly as it makes its way between bracken on the left and rushes on the right.

-
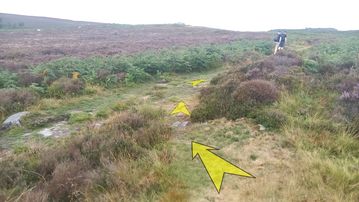
After about 200 metres the path bears right, with a less distinct branch continuing through the long grass ahead.
Follow the path to the right here.

-
The path now starts to climb again, and about 200 metres after the indistinct branch, it reaches another T-junction. Higger Tor is clearly visible directly ahead here, but we’re going to head over to Carl Wark first, with its ancient Hill Fort.
Turn right at the T-junction and follow the grassy path.

-
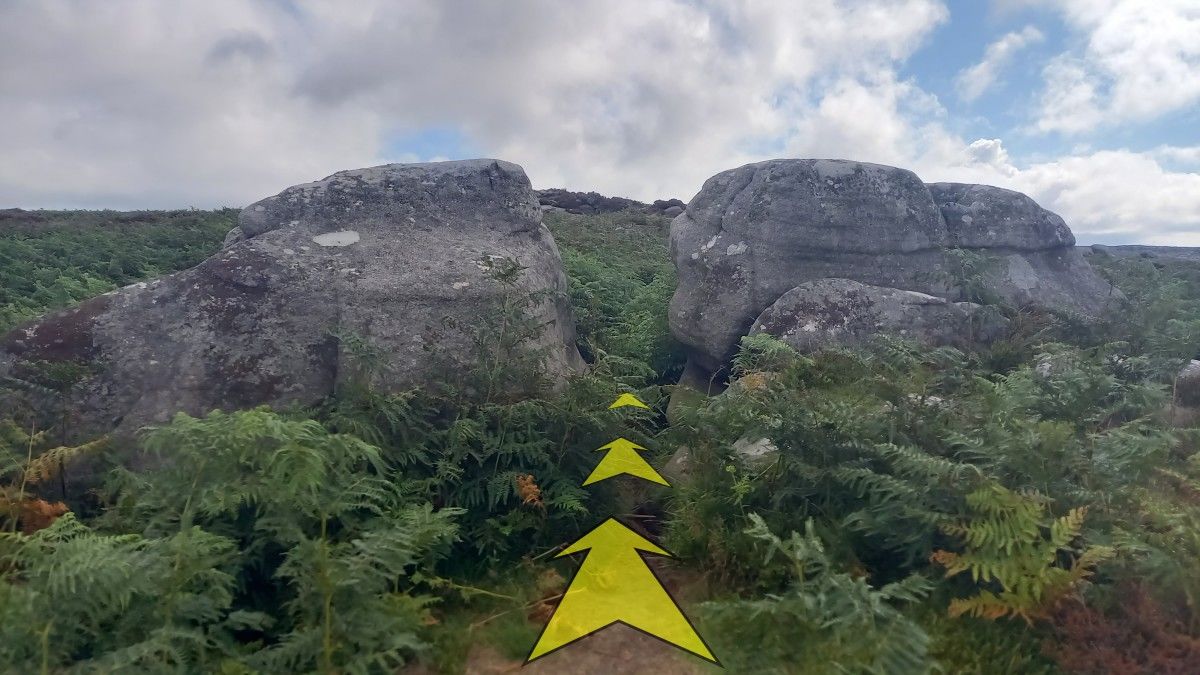
Not far from the T-junction, pass through a narrow gap between two large gritstone boulders and continue on towards Carl Wark.

-
Continue on up to Carl Wark. There are many paths through the bouldery ground hereabouts, but we’re heading for the north-western end of Carl Wark, which is the end closest to Higger Tor.
-
Once you’ve reached a high point on Carl Wark, it’s worth exploring the area for the impressive gritstone outcrops and the views over the surrounding landscape. There’s also an ancient rampart/stone wall here, which is part of the Hill Fort.
Once you’ve finished exploring, drop down and slightly to the left to join an obvious track heading towards Higger Tor.
Bear left onto this track.
-
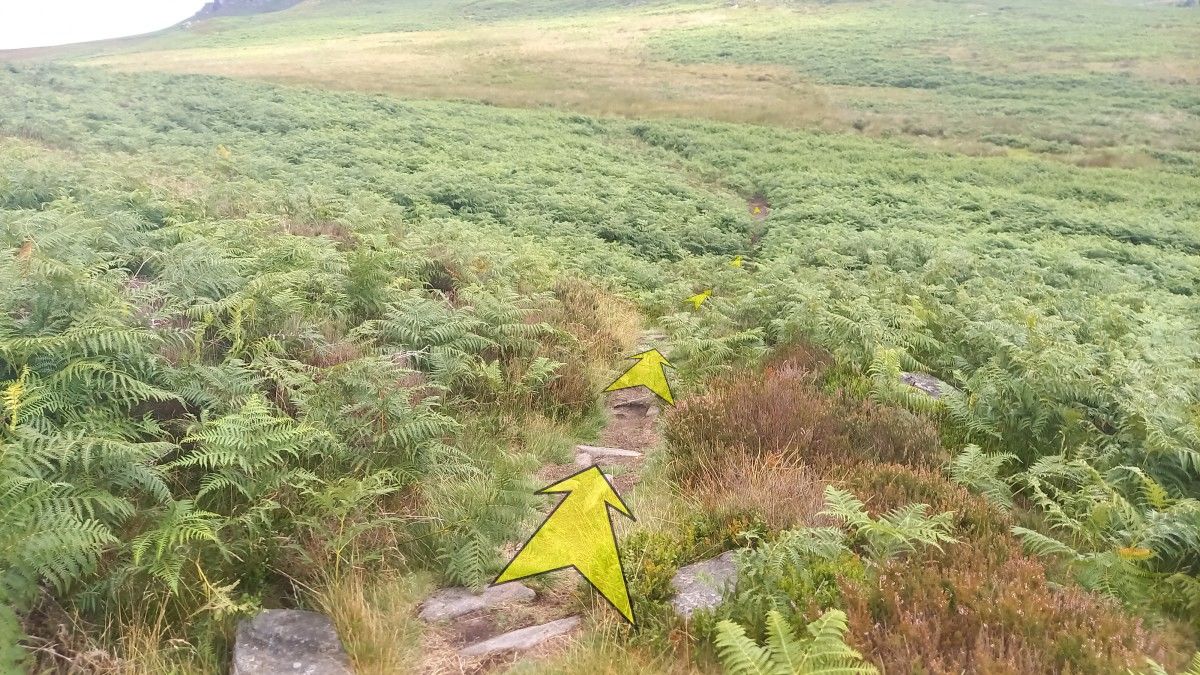
The track now drops down off Carl Wark, and the route onwards to Higger Tor is very clear ahead.
Continue along the main track, ignoring any side paths.
-
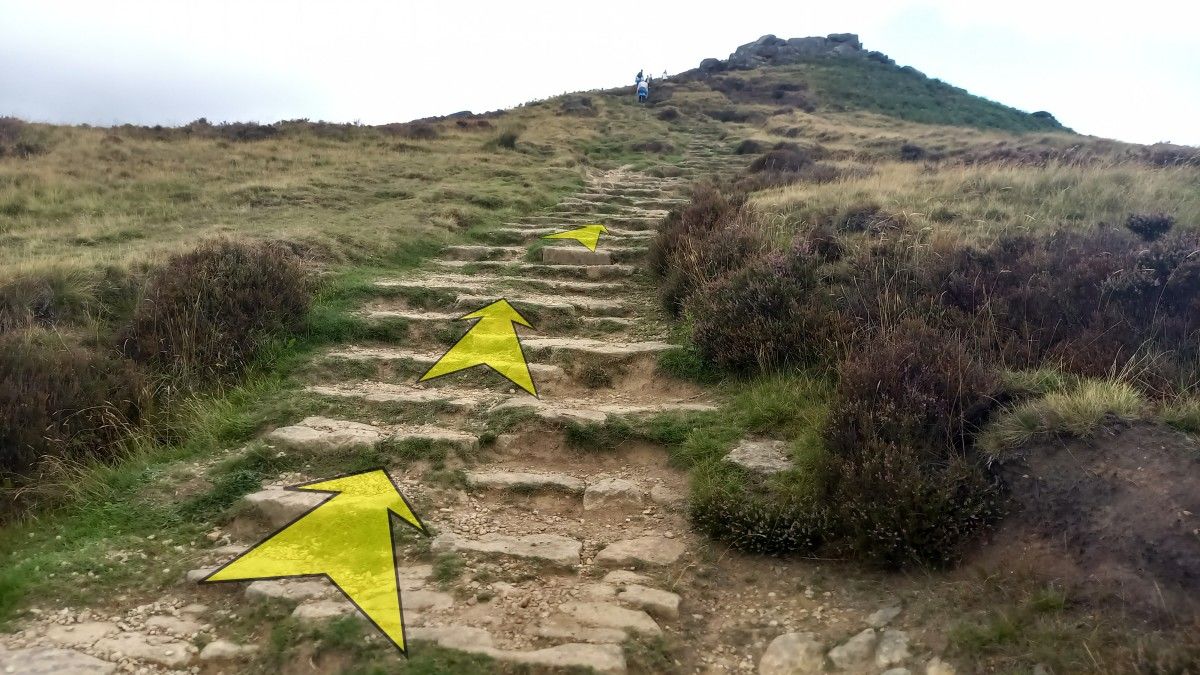
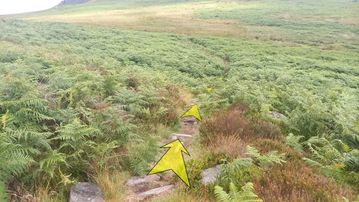
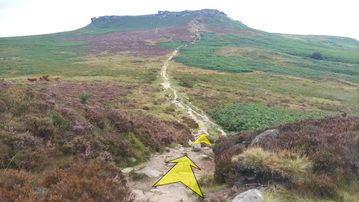
As you start to climb up onto Higger Tor, the track becomes quite eroded – you may find the ground easier to your right here.
Stone steps make the climb easier as the track steepens on the side of Higger Tor.
The final section up onto the flattish top of the tor is very rocky. There are many different routes you can take here, making it easier or harder as you wish while you traverse the gritstone outcrops.

-
Once onto the top of Higger Tor, it’s worth spending some time exploring the numerous outcrops and drinking in the excellent views.
Once you’re ready to head off, continue on in roughly the same direction as you arrived, towards the northern end of Higger Tor. Follow the obvious broad peaty track, interspersed with gritstone outcrops and boulders.
-
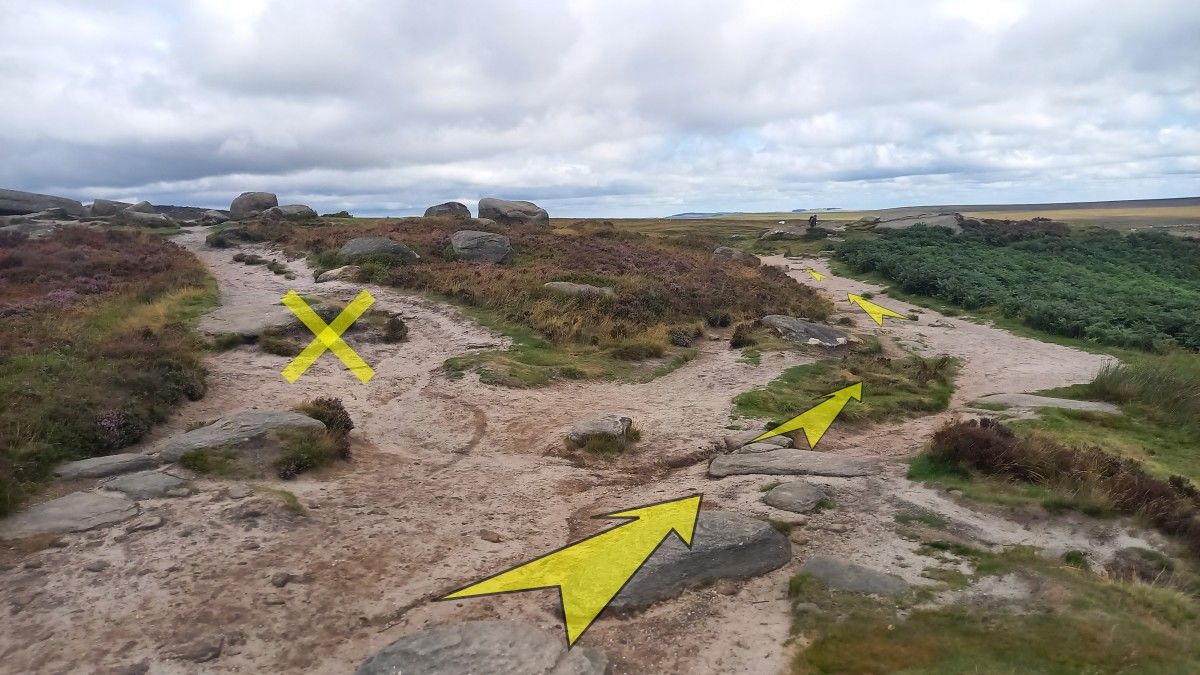
After about 100 metres, bear right at a fork in the tracks.

-
After a further 50 metres, bear right again at a fork in the tracks (the left fork descends towards a parking area, but we’re not going this way).
-
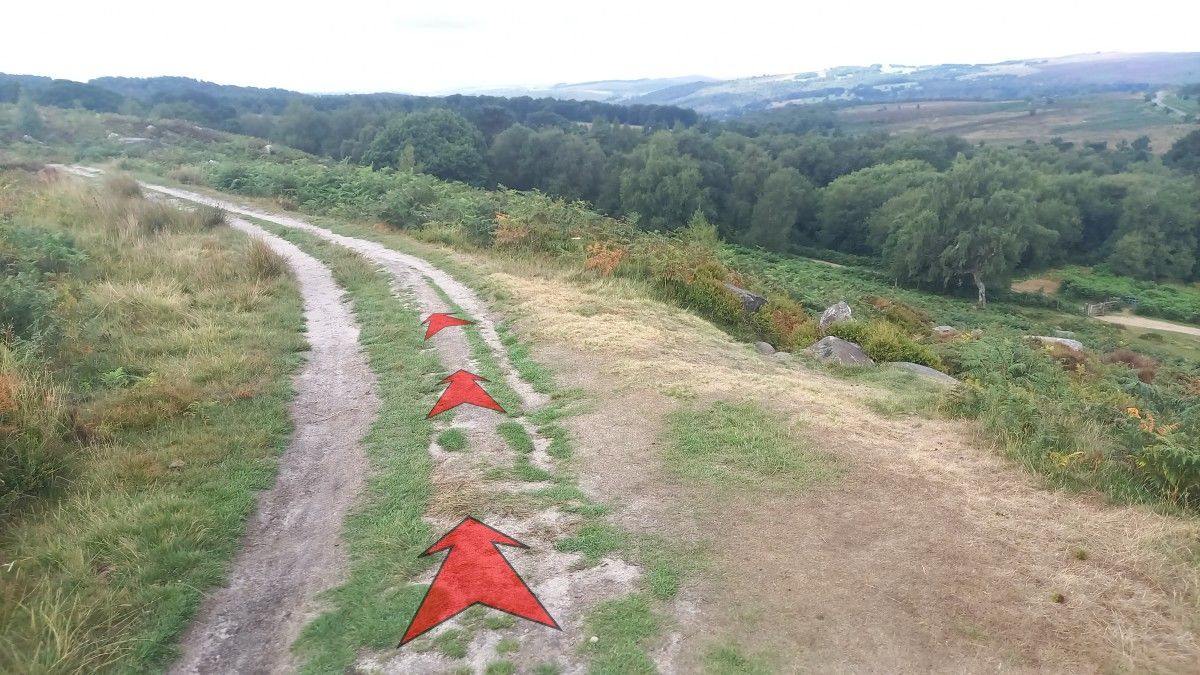
The broad track now starts to lose height off Higger Tor, and the way ahead (leading you back towards the main Upper Burbage Bridge Car Park) is obvious in clear weather
-
Continue along the track for about ½-a-kilometre, initially dropping, then climbing gently again until you reach a short steeper section that climbs through some small boulders.
At the top of this steeper section, the track levels out again and continues on towards the road, gradually losing height down to the main car park.
-
About 300 metres from the top of the steeper section, you’ll reach the main car park at Upper Burbage Bridge.